PointKit
Autodesk Revit Add-in to boost your productivity when working with Point Clouds.
Table of contents
Select Points
Click the arrow next to Select Points to choose Select Points or Select Between Levels.
Select Points
Draw a box around the points you need, and PointKit isolates them.
Steps:
- Open a plan view that shows the point cloud.
- Click Select Points.
- Click and drag a box around the points you want to keep.

Note: the version on the image may not reflect the latest version of PointKit/DiRootsOne.
Select Between Levels
Keep only the points between two levels.
Steps:
- Open a view that shows the point cloud, for example a section. A 3D view must be orthographic, not perspective.
- Click the arrow next to Select Points and choose Select Between Levels.
- Under Select start and end levels, choose the start level and the end level. Use Offsets to move either limit up or down.
- Click Isolate.

Note: the version on the image may not reflect the latest version of PointKit/DiRootsOne.
Undo, Redo and Reset
Step through your selections with the small buttons next to Select Points.
- Undo reverts the last selection.
- Redo reapplies the selection you just undid.
- Reset clears all selections, so no points are isolated.

Note: the version on the image may not reflect the latest version of PointKit/DiRootsOne.
Show/Hide
Click Show/Hide to hide all point clouds in the current view. If any of them is already hidden, it shows the hidden ones instead.

Note: the version on the image may not reflect the latest version of PointKit/DiRootsOne.
Import DXF File
Import a DXF file into a new family. PointKit creates the family from the template you choose, opens it and imports the file.
Steps:
- Click Import DXF File.
- Click Browse and select your family templates folder. Then choose a template under Select Family Template.
- Choose how to place the file: Import Center to Center or Import Origin to Internal Origin.
- Click Import and select the .dxf file.

Note: the version on the image may not reflect the latest version of PointKit/DiRootsOne.
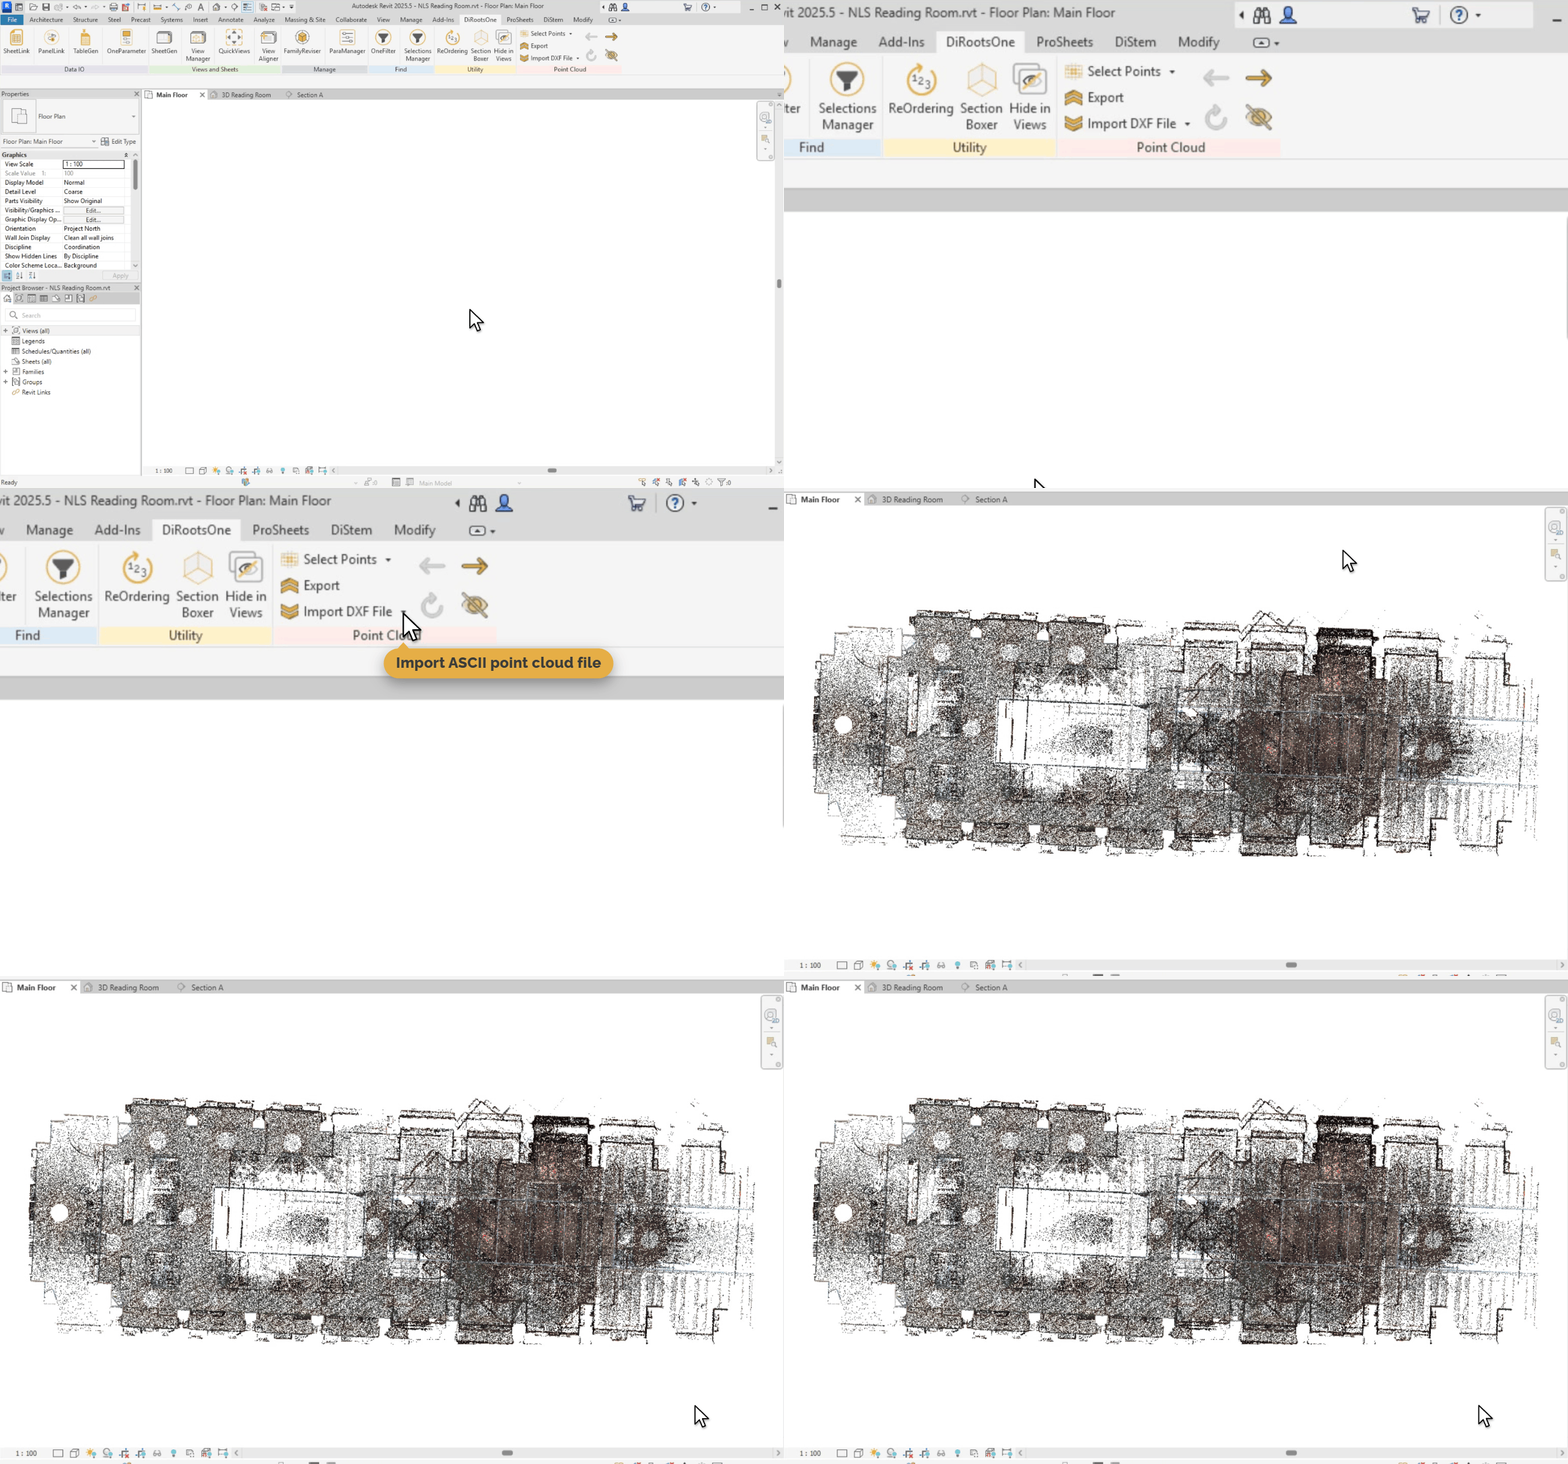
Import ASCII point cloud file
Import a point cloud saved as an ASCII text file (.pts or .xyz).
Steps:
- Click the arrow next to Import DXF File and choose Import ASCII point cloud file.
- Select the .pts or .xyz file on your computer.
The file’s origin is placed at Revit’s internal origin.
Note: the version on the image may not reflect the latest version of PointKit/DiRootsOne.
Export
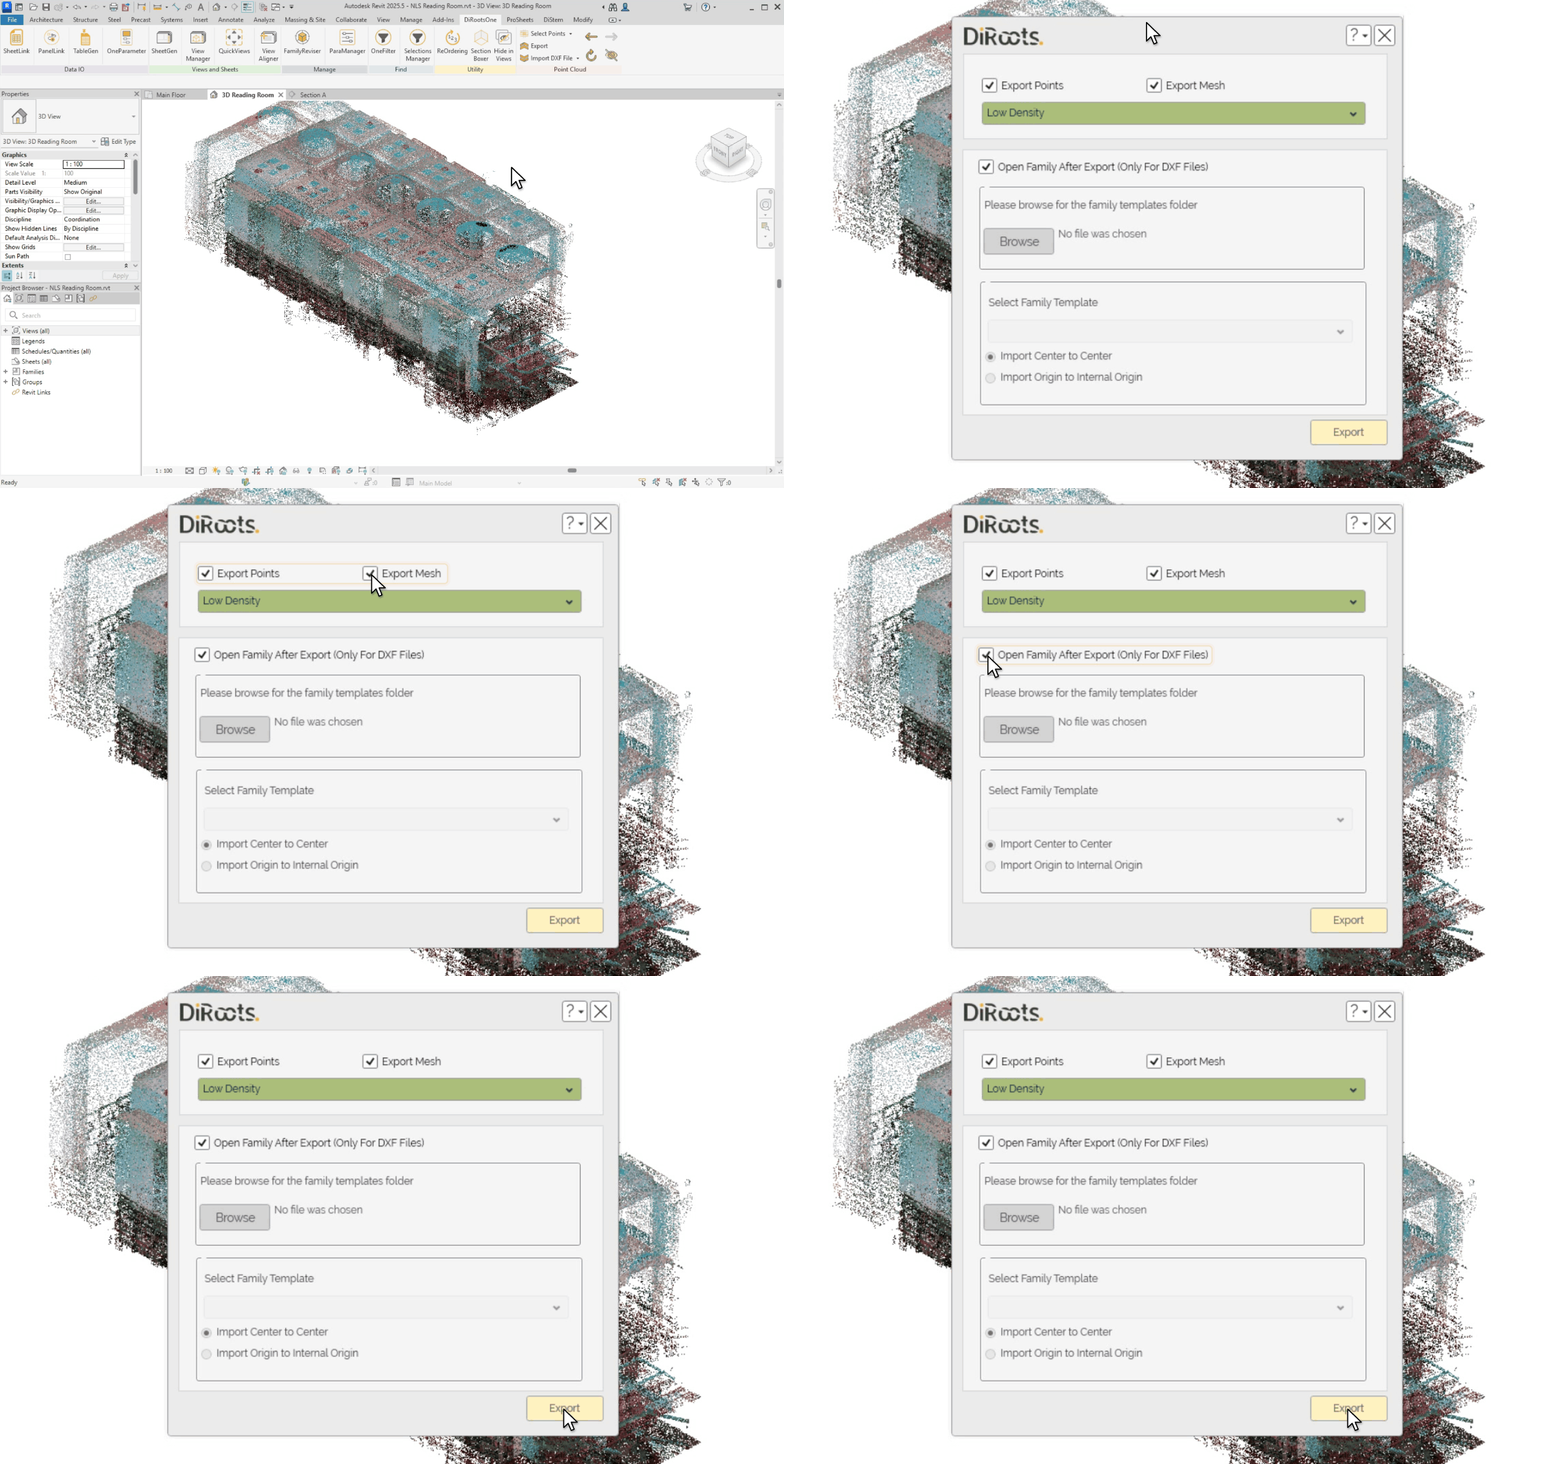
Export the isolated points, or the whole point cloud when nothing is isolated.
Steps:
- Click Export.
- Choose Export Points, Export Mesh or both.
- Choose the density: Low Density, Medium Density or High Density.
- Open Family After Export (Only For DXF Files) is selected by default. It creates a family from the exported .dxf file and opens it: browse to your family templates folder, then choose a family template and the orientation (Import Center to Center or Import Origin to Internal Origin). Clear the checkbox if you only need the file.
- Click Export and choose where to save the file.
Points alone can be saved as .pts, .xyz or .dxf. When Export Mesh is selected, the file is saved as .dxf.
Note: the version on the image may not reflect the latest version of PointKit/DiRootsOne.
If you want to find out more about PointKit and explore detailed tutorials on how to use it, visit our YouTube channel. There, you’ll find a series of videos that can help answer questions and improve your knowledge. Be sure to check it out and subscribe to keep up to date with our news and tips!
Point cloud in the animations: “LiDAR point-cloud: George IV Bridge, National Library of Scotland”, University of Edinburgh and National Library of Scotland, doi.org/10.34812/6ch4-rp49, licensed under CC BY 4.0. Changed: thinned, rotated, recentred, cropped, recoloured, heights shifted and converted for PointKit.