ReOrdering
Easily renumber instance Revit parameters by using a prefix, a suffix, and a multiplier (manually or following a path/detail line).
Table of contents
ReOrdering
The ReOrdering plugin allows the user to organize elements in the ideal order.
Follow the steps below:
- The first step is to select whether you want to apply filters based on the Whole Model, the Active View or the Current Selection. Select the radio button to choose the view.
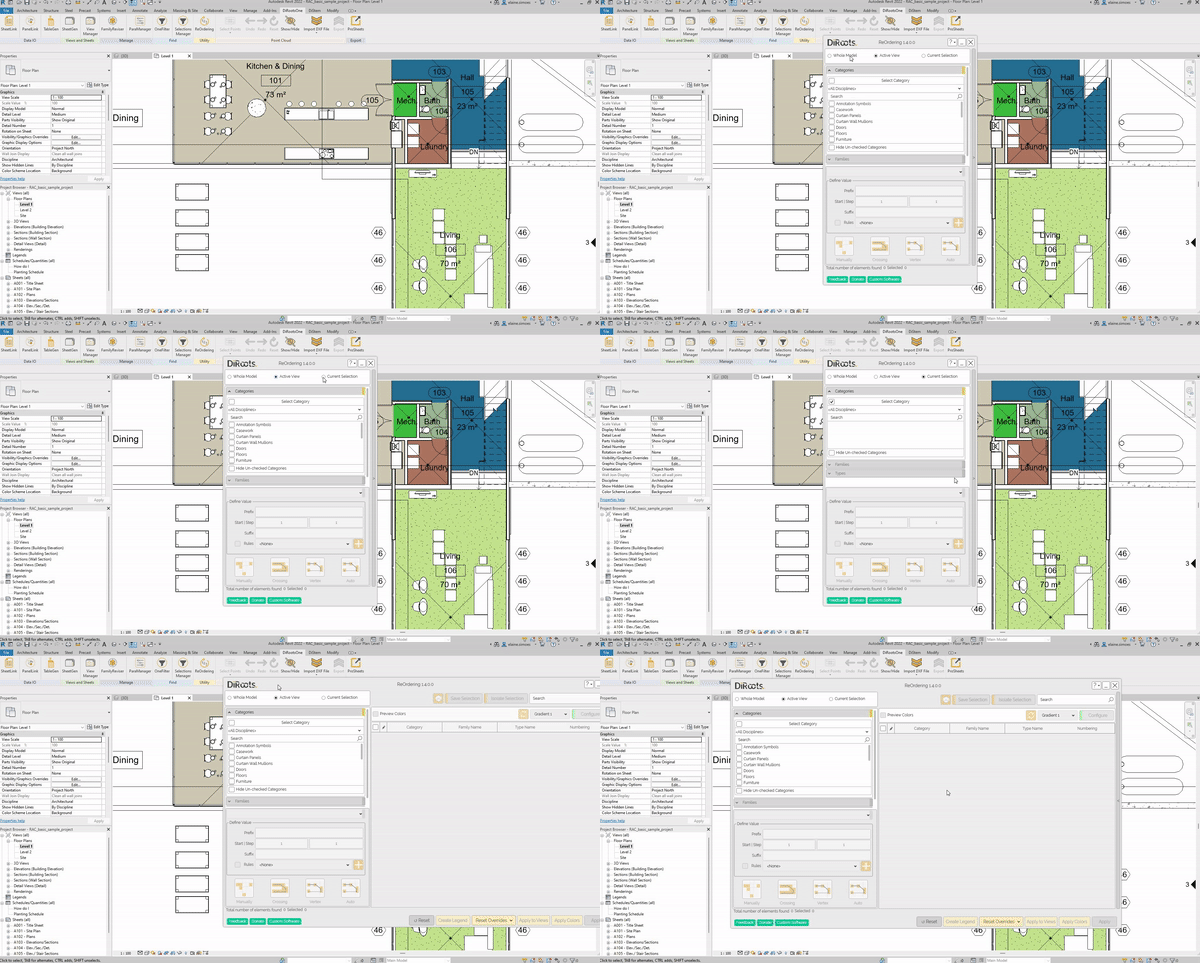
Note: the version on the image may not reflect the latest version of ReOrdering/DiRootsOne.
- Now, use the checkboxes to select the categories to filter. Note that, once you have selected the categories, on the Family table will show the existing families to be selected.
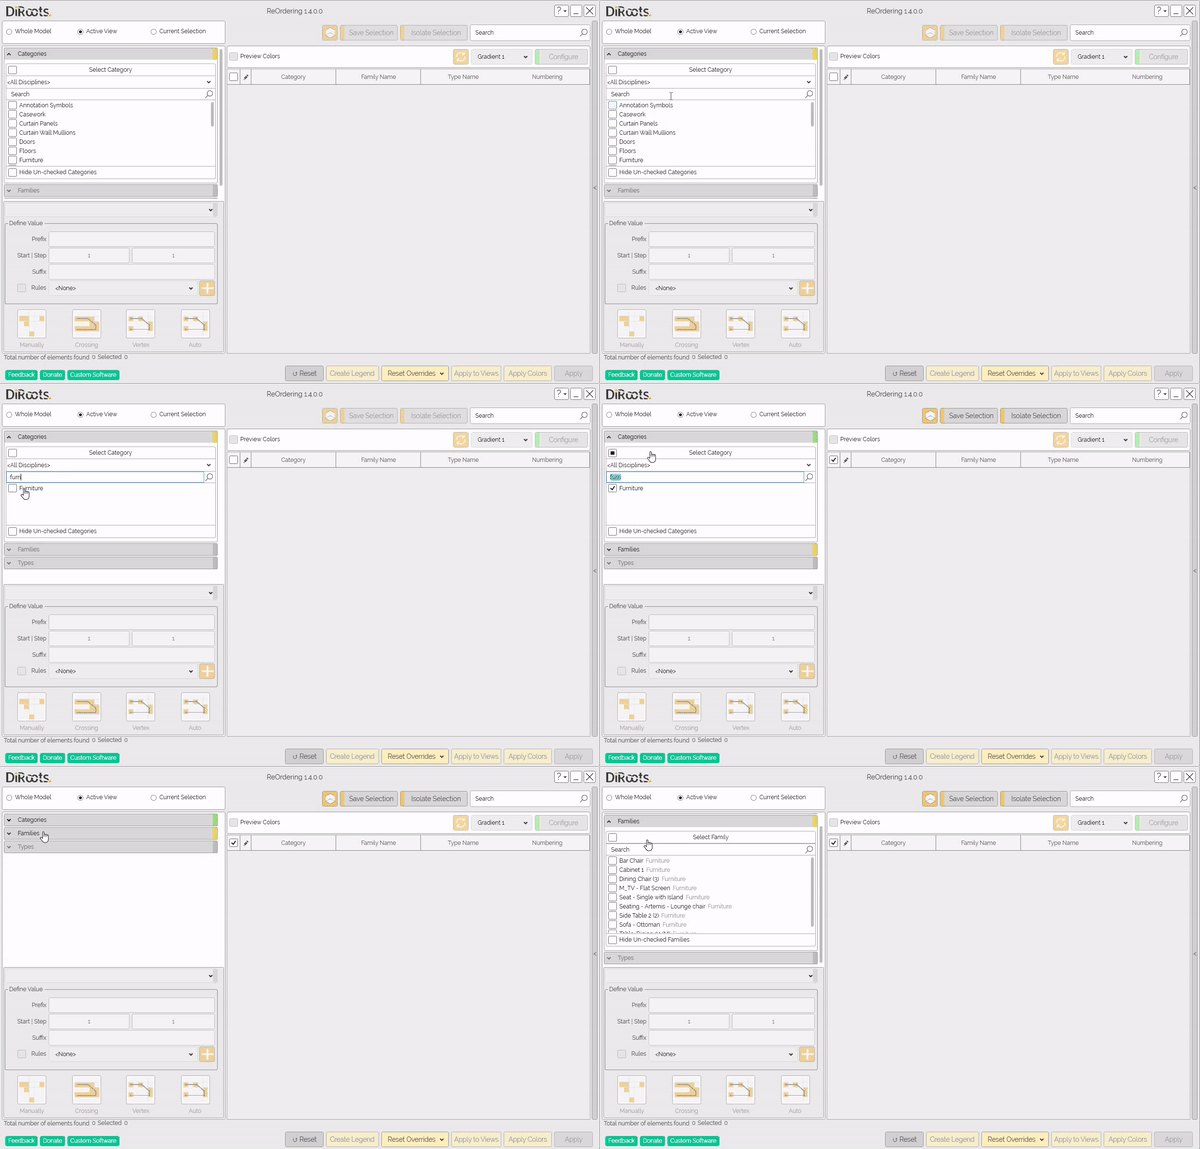
Note: the version on the image may not reflect the latest version of ReOrdering/DiRootsOne.
- When selecting the desired family, note that the Type table will be active for selecting element types.
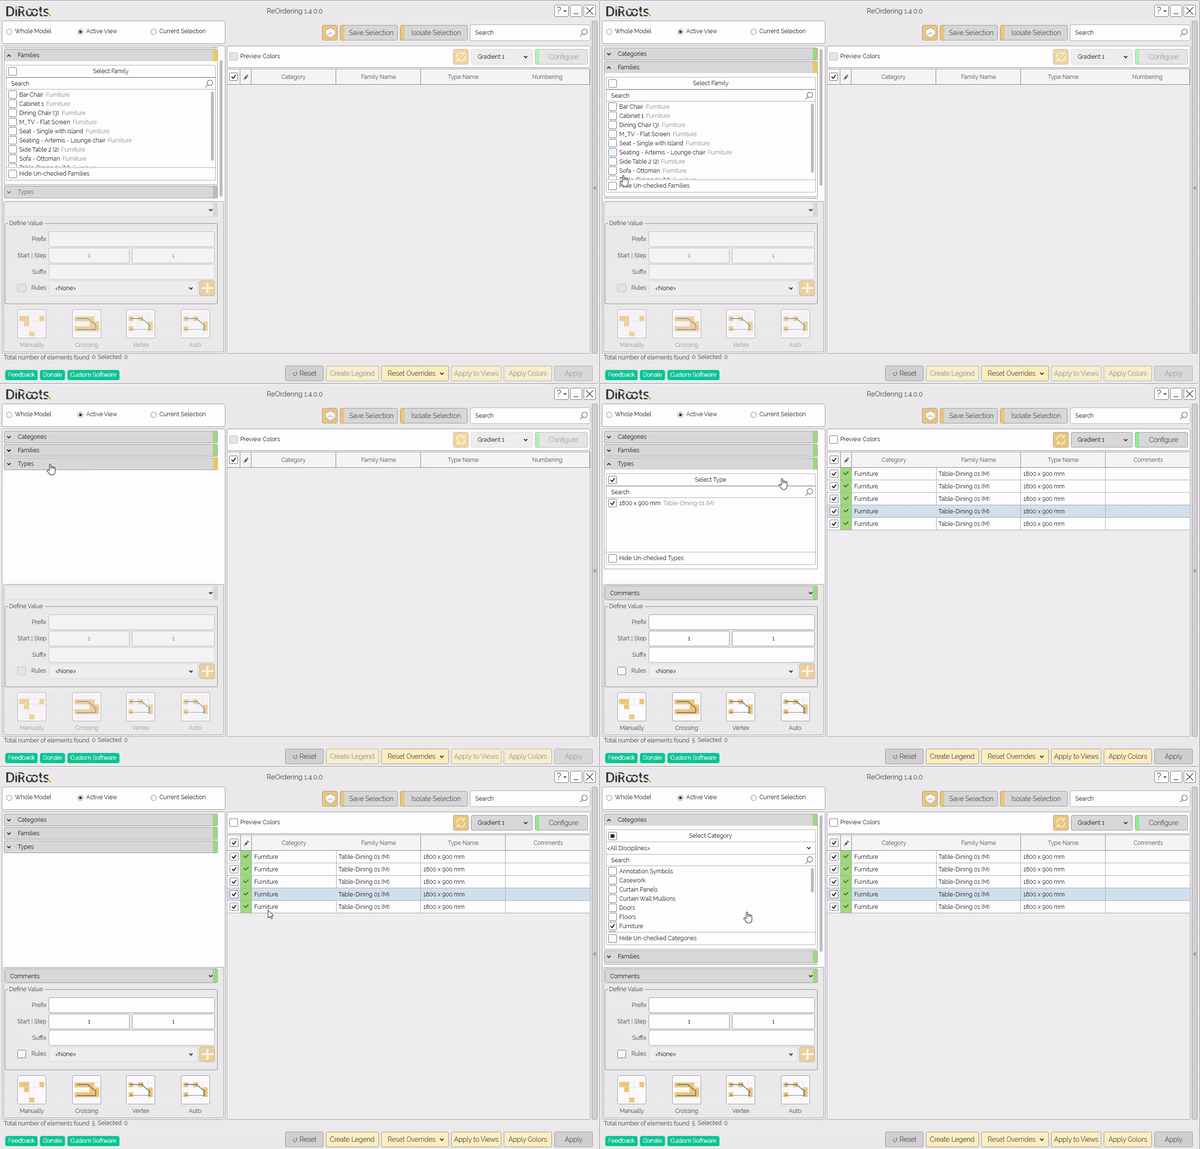
Note: the version on the image may not reflect the latest version of ReOrdering/DiRootsOne.
# Note:
Note that the header of the Category, Family and Type tables is an accordion component. Click on these headings to expand and collapse the view of the tables.
Define Value
-
The first step is to select from the first list which parameter you want to apply the new order to.
-
The next step is to fill the fiels bellow.
- Prefix: this field it is not mandatory, but you can enter a value.
- Start & Step: Define the number at which the order should begin, and the steps that should advance the number sequence.
- Suffix: this field it is not mandatory, but you can enter a value.
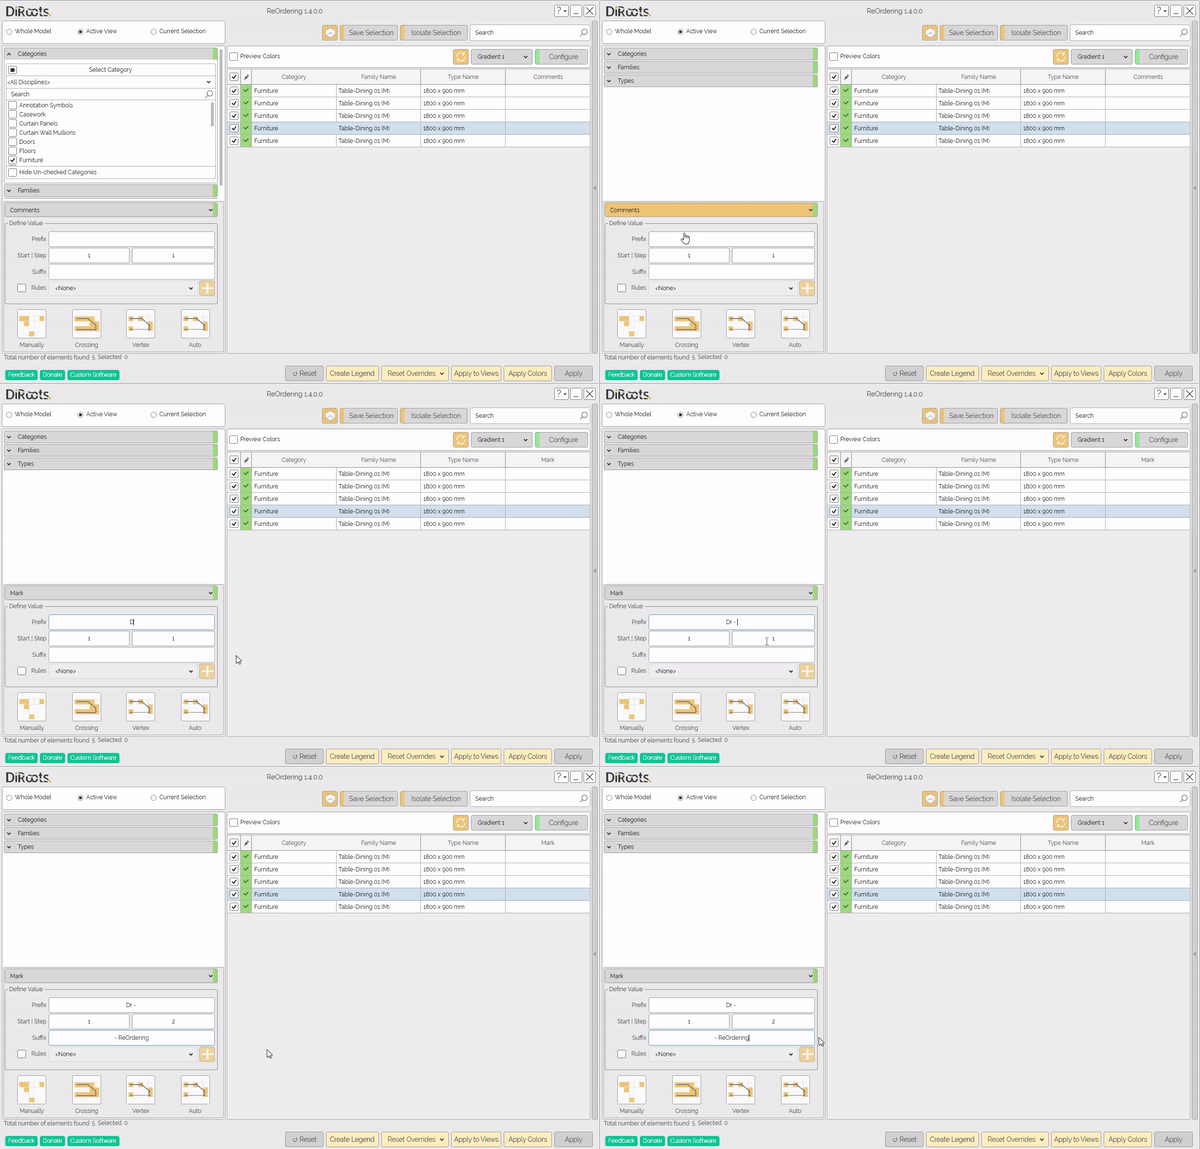
Note: the version on the image may not reflect the latest version of ReOrdering/DiRootsOne.
Rules
Create new rules or edit existing ones. You can choose to define a prefix and suffix to apply the element numbering, but if you prefer you can create a rule to name the numbering. Select the Rules checkbox and the prefix and suffix fields will be locked. Click on the button to add a new rule, and the window will open with the parameters that can be added to the element numbering.
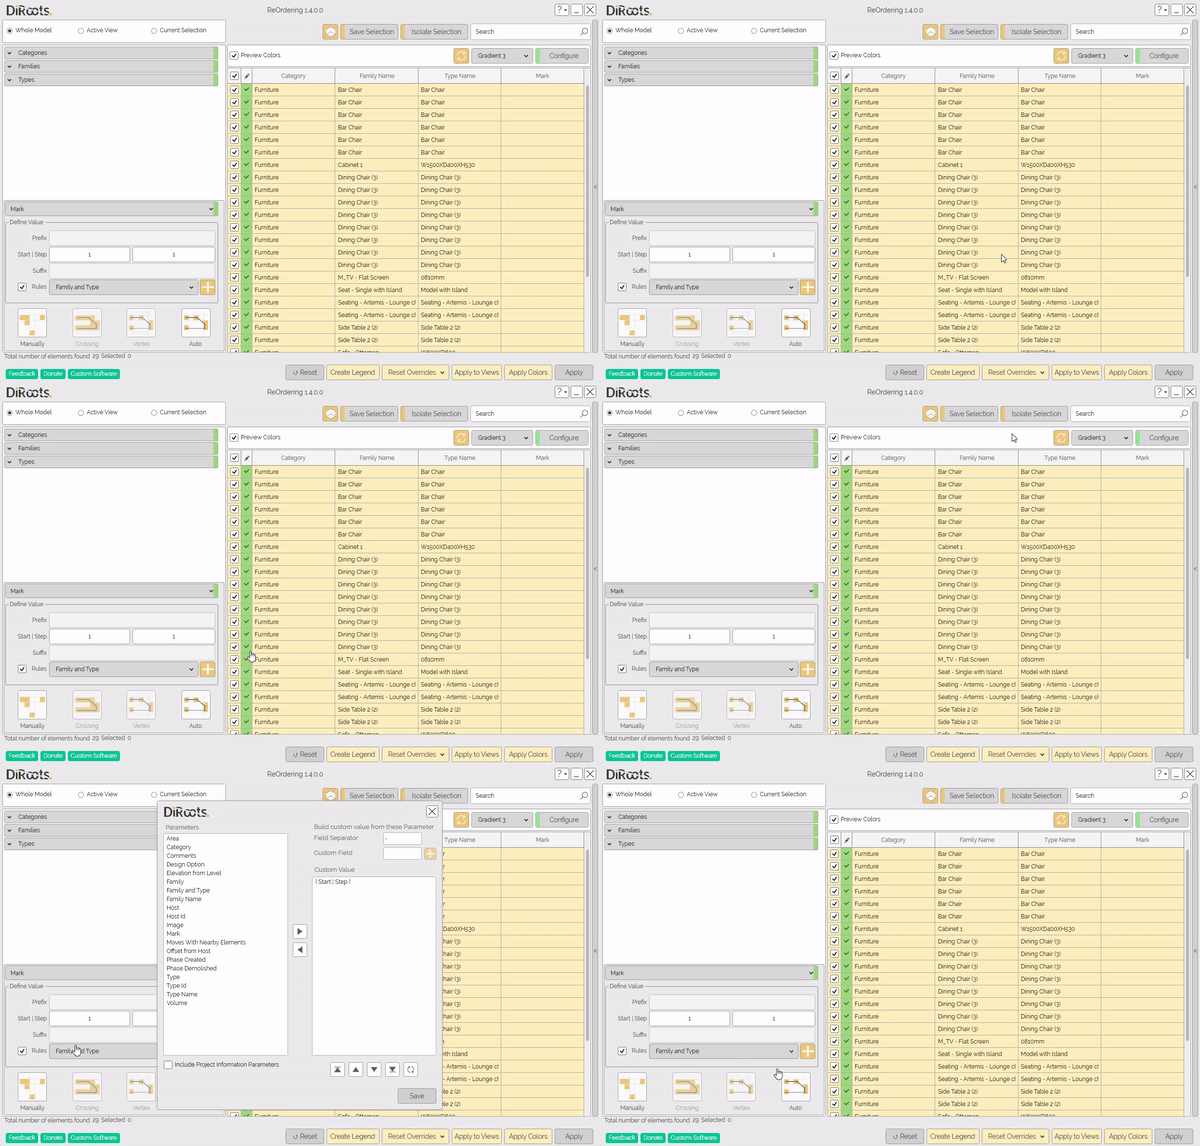
Note: the version on the image may not reflect the latest version of ReOrdering/DiRootsOne.
- To complete the order of the elements, choose the order to be followed.
- Manually: manually select elements in the model to apply the numbering value. You will be able to apply incremental and non-incremental values.
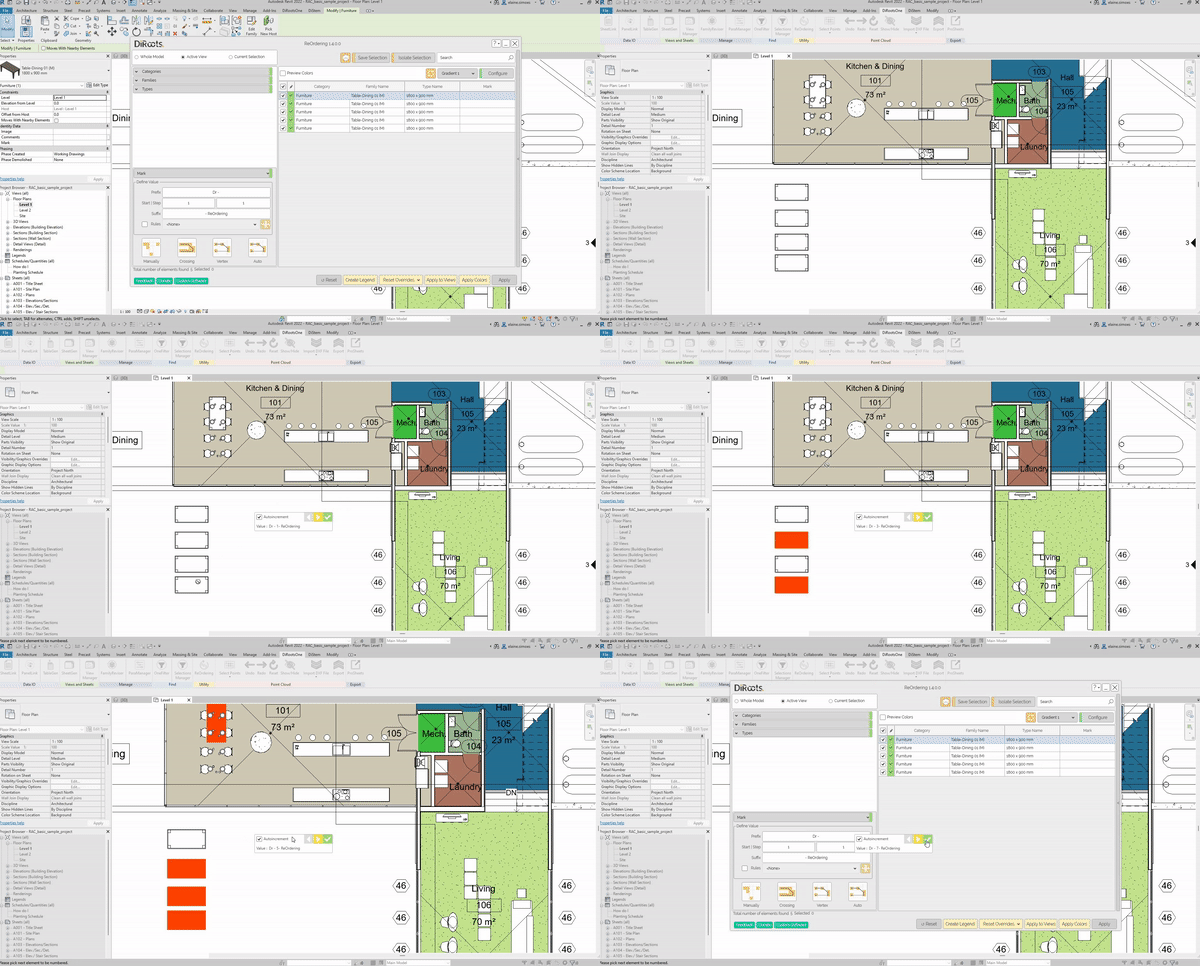
Note: the version on the image may not reflect the latest version of ReOrdering/DiRootsOne.
- Crossing: to renumber elements draw a detail line and all elements of the that fit criteria above will be numbered. If the line touches the element it will be counted.
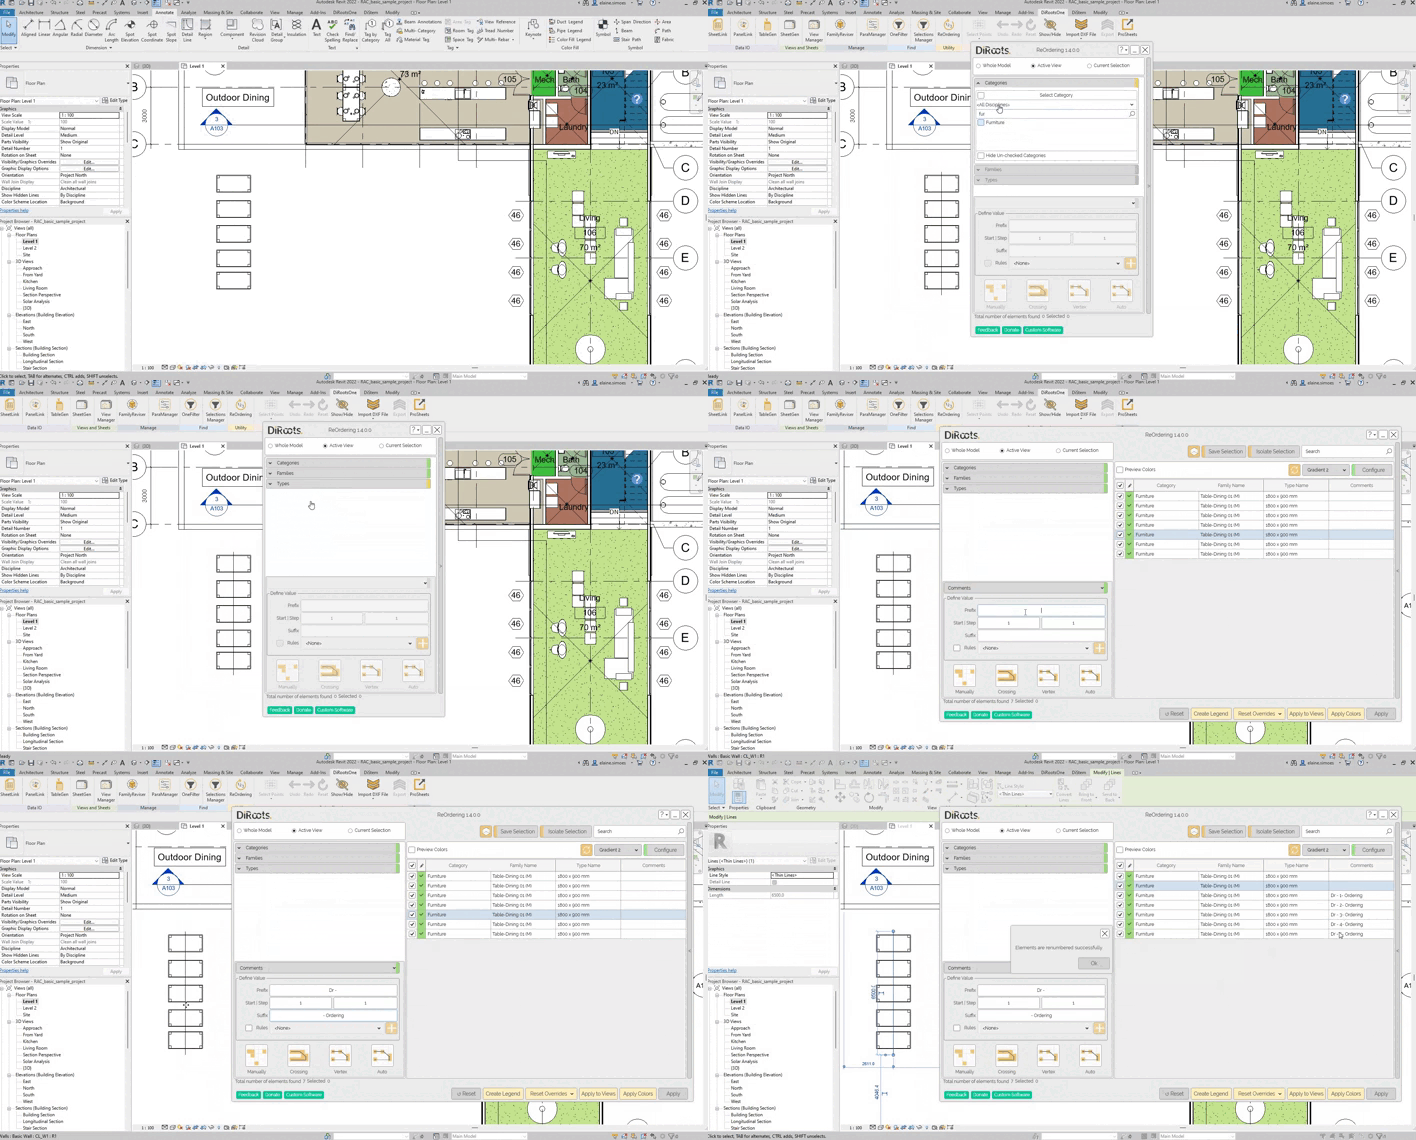
Note: the version on the image may not reflect the latest version of ReOrdering/DiRootsOne.
- Vertex: to renumber elements draw a line and all elements that line endpoint (vertex) touch will be numbered. Line drawing direction/orientation will be taken into account.
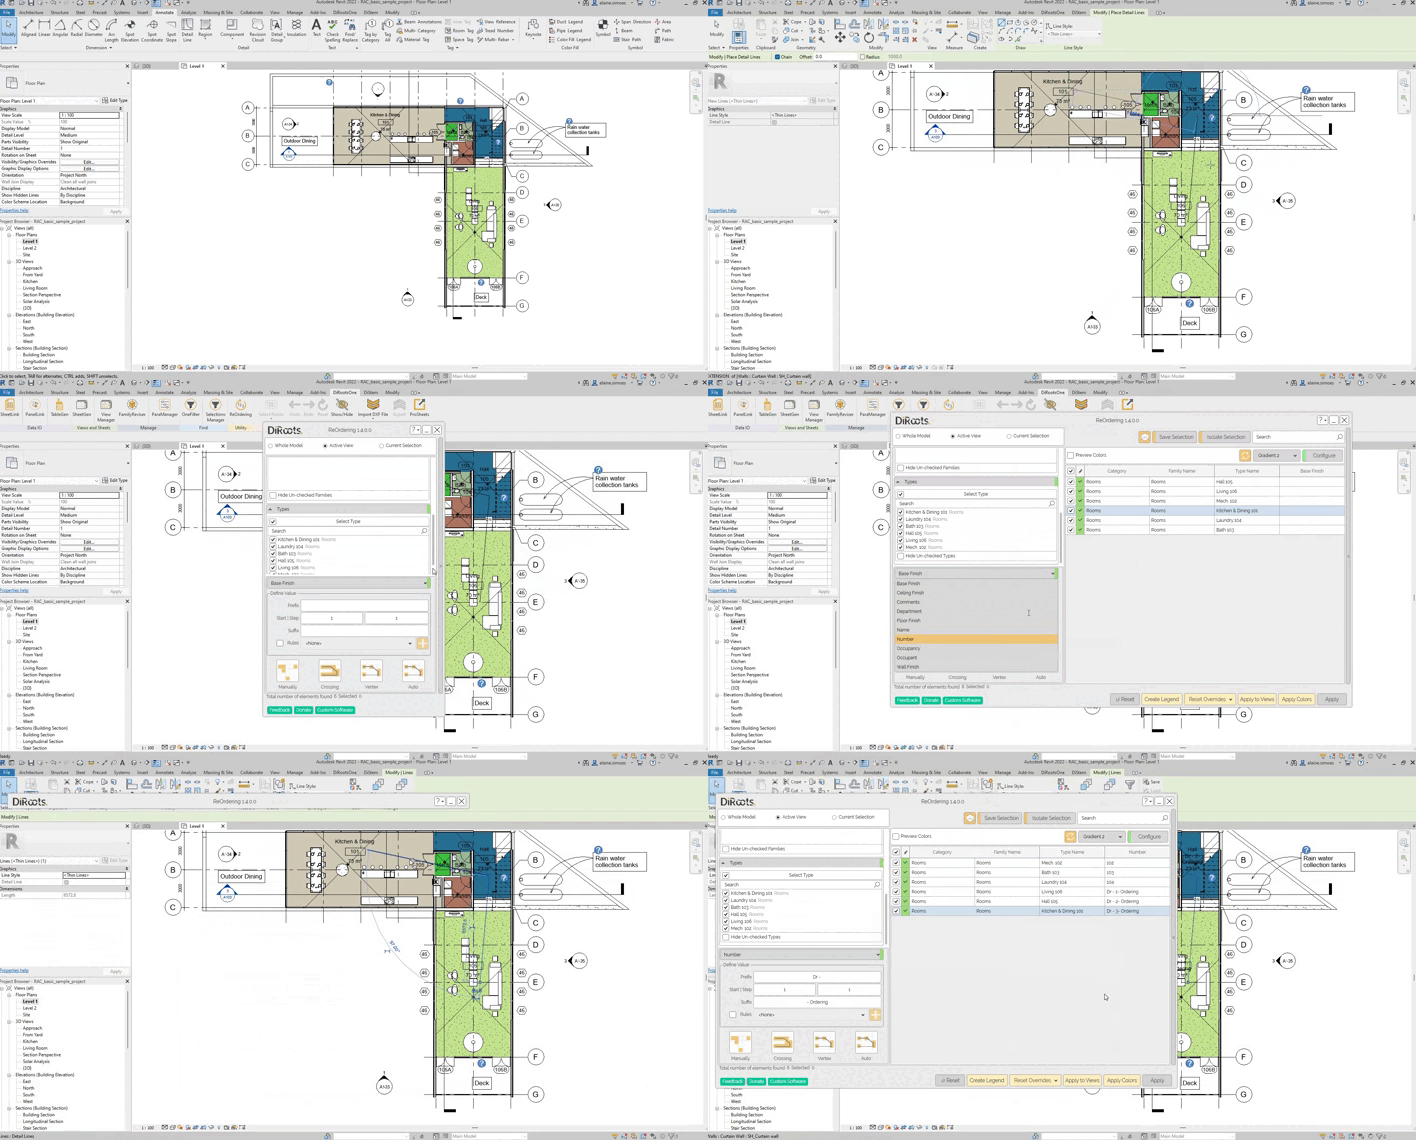
Note: the version on the image may not reflect the latest version of ReOrdering/DiRootsOne.
- Auto: Random place unique number is chosen elements in the model. Values will be directly applied to the parameter you chose above.
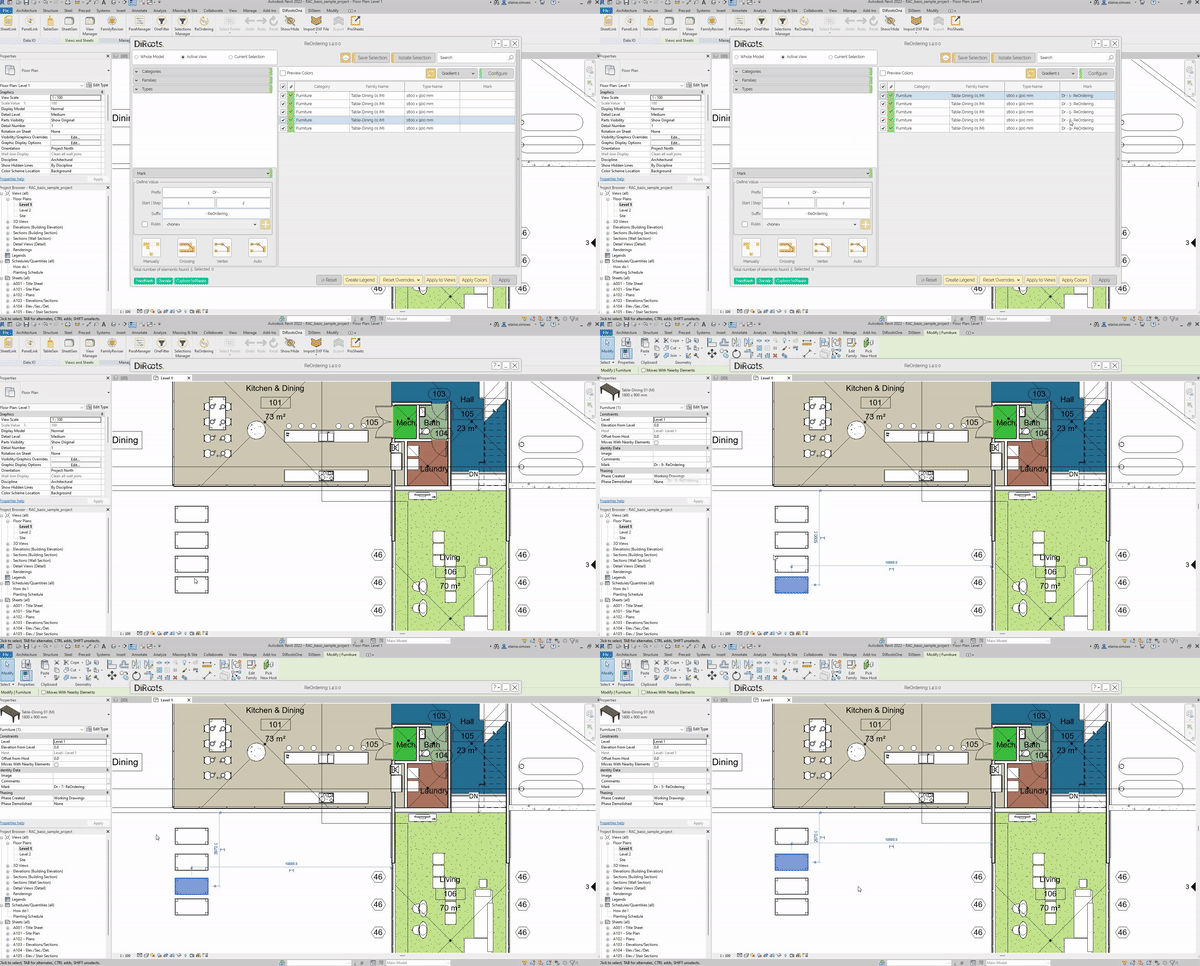
Note: the version on the image may not reflect the latest version of ReOrdering/DiRootsOne.
Remove values
Once you have selected the category, family and type and set the values, click on the Remove all Values button to clear the assigned values.
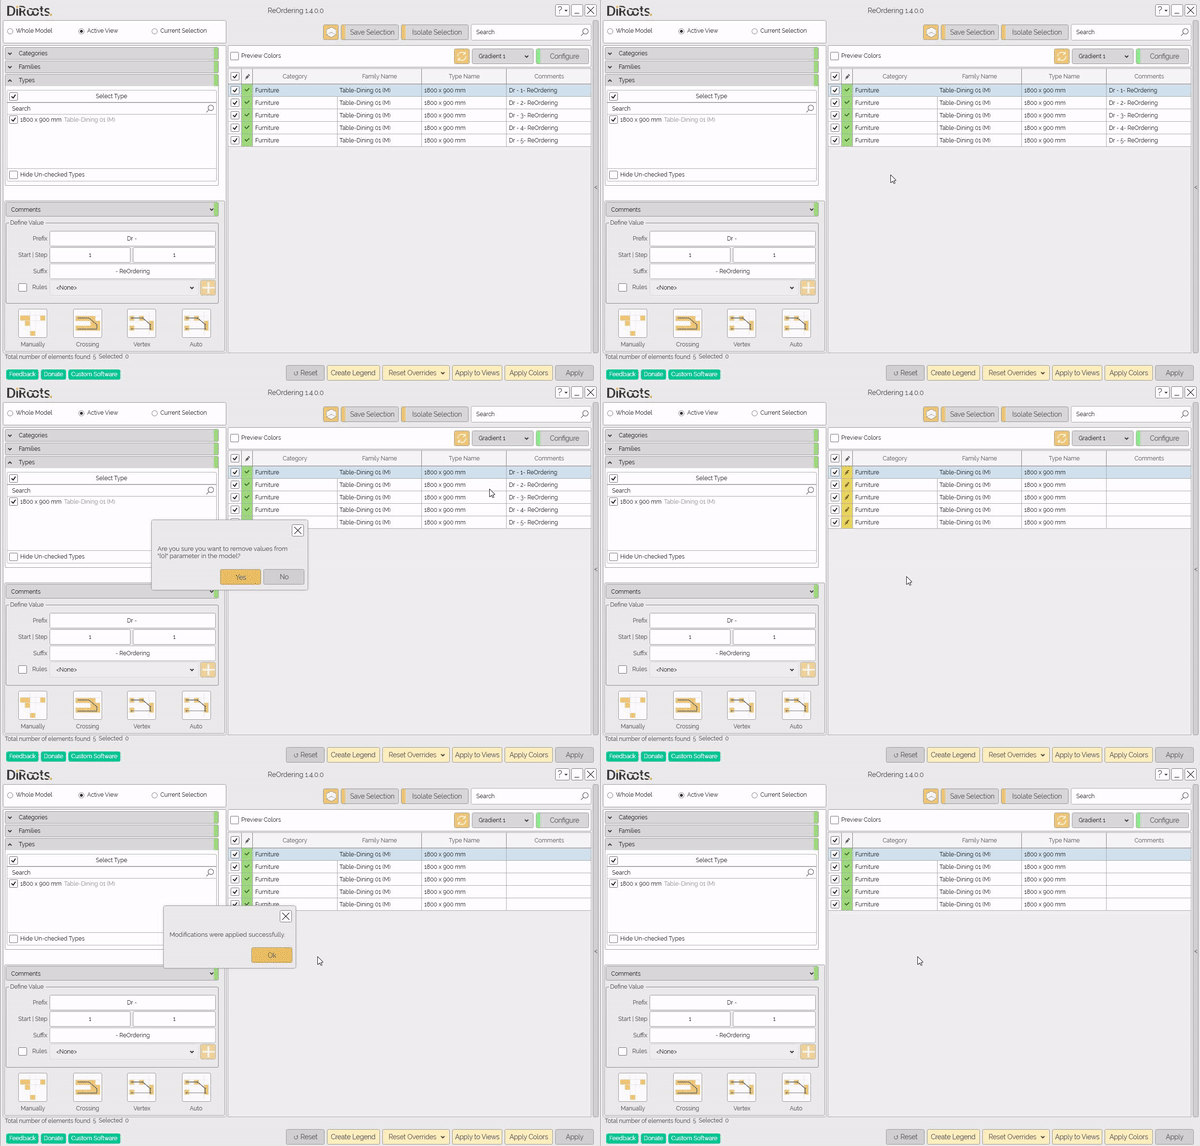
Note: the version on the image may not reflect the latest version of ReOrdering/DiRootsOne.
Preview Colors
By default, the selected elements have no colors assigned. Select the Preview Colors checkbox to assign colors to the elements.
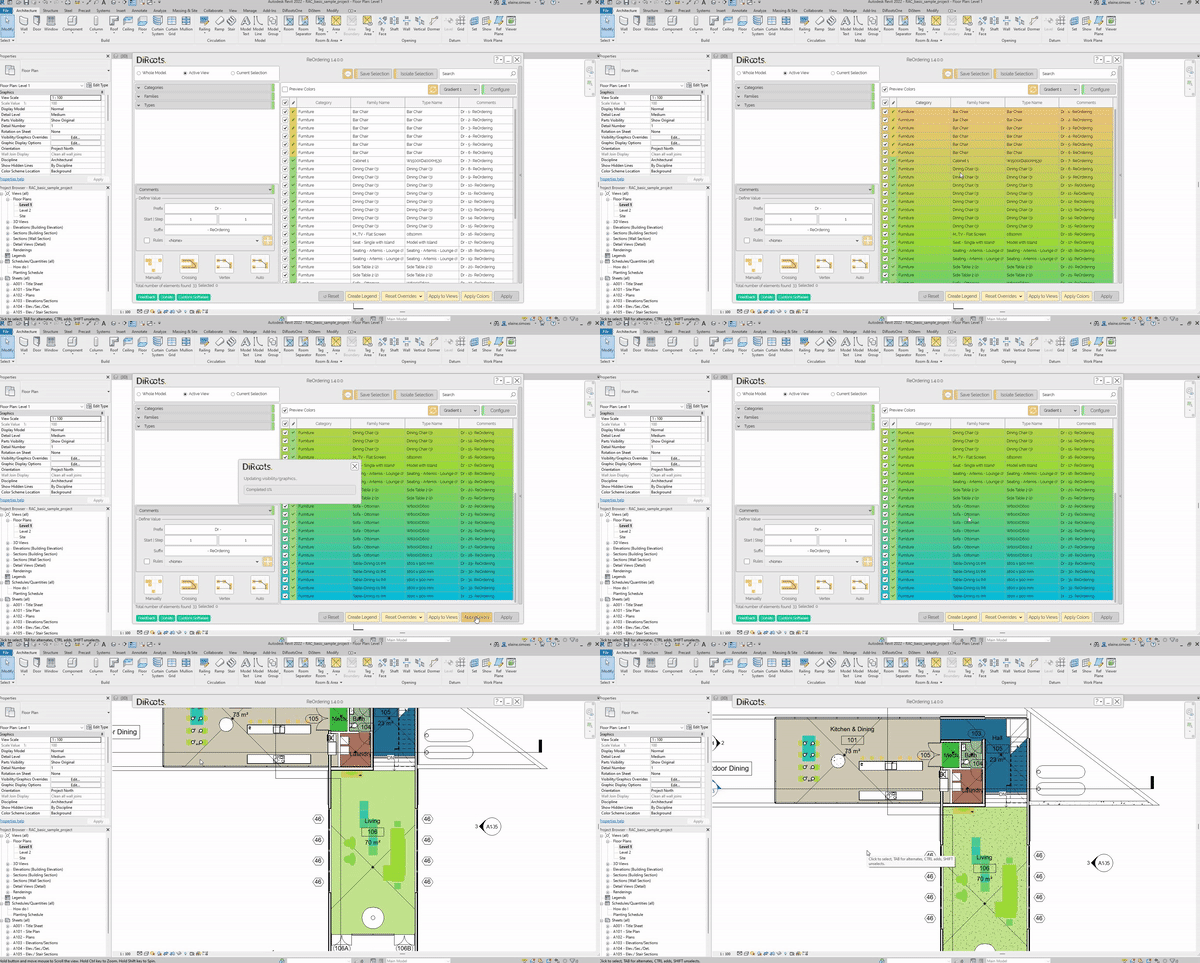
Note: the version on the image may not reflect the latest version of ReOrdering/DiRootsOne.
Gradient Colors
In the Gradient list, select the gradient you prefer.
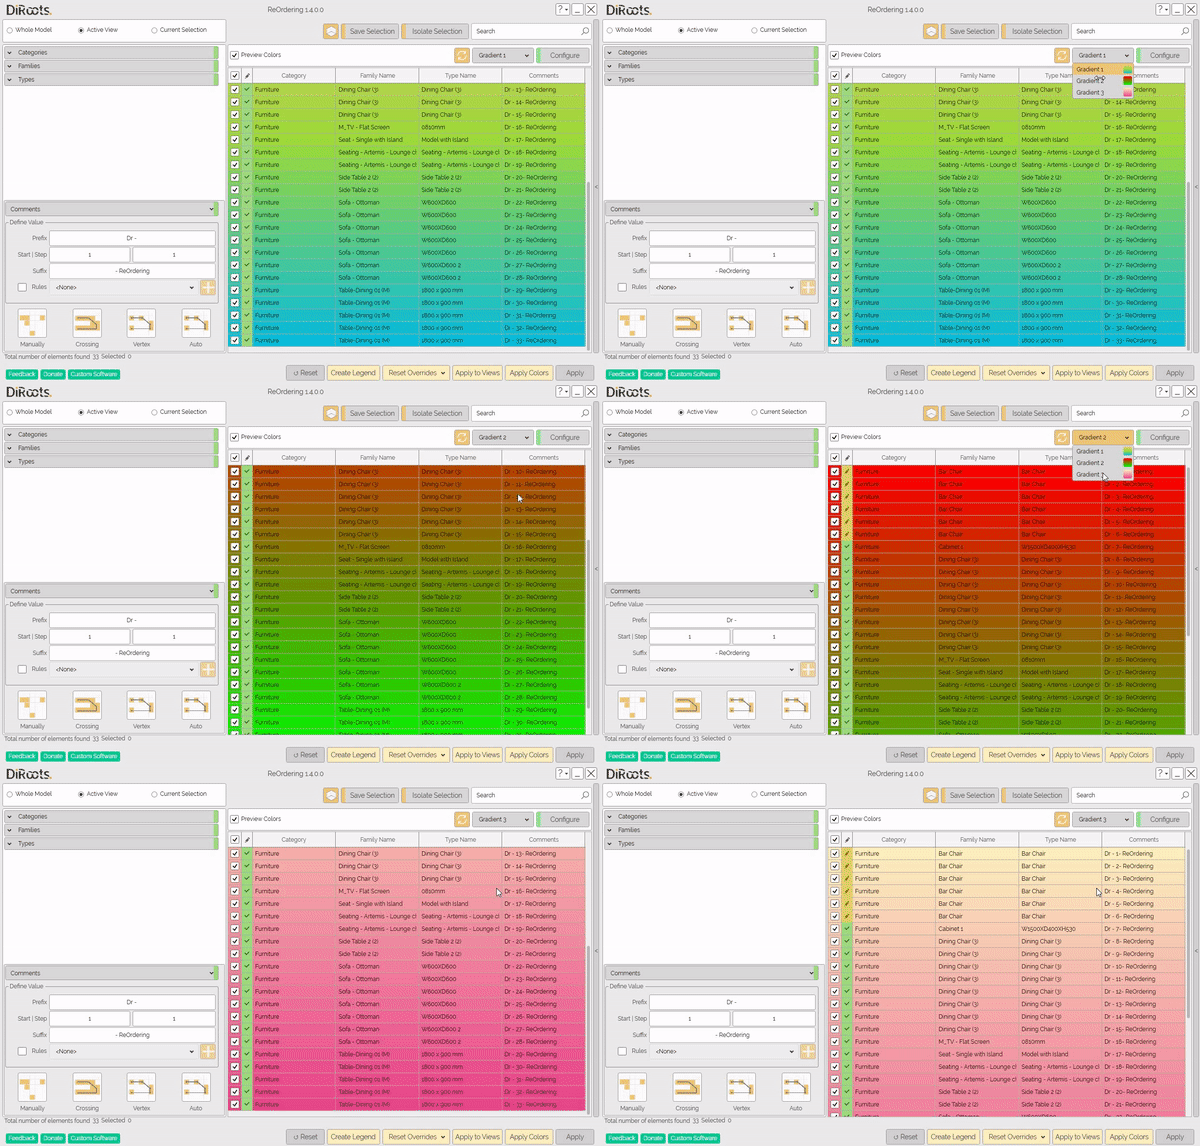
Note: the version on the image may not reflect the latest version of ReOrdering/DiRootsOne.
Configure
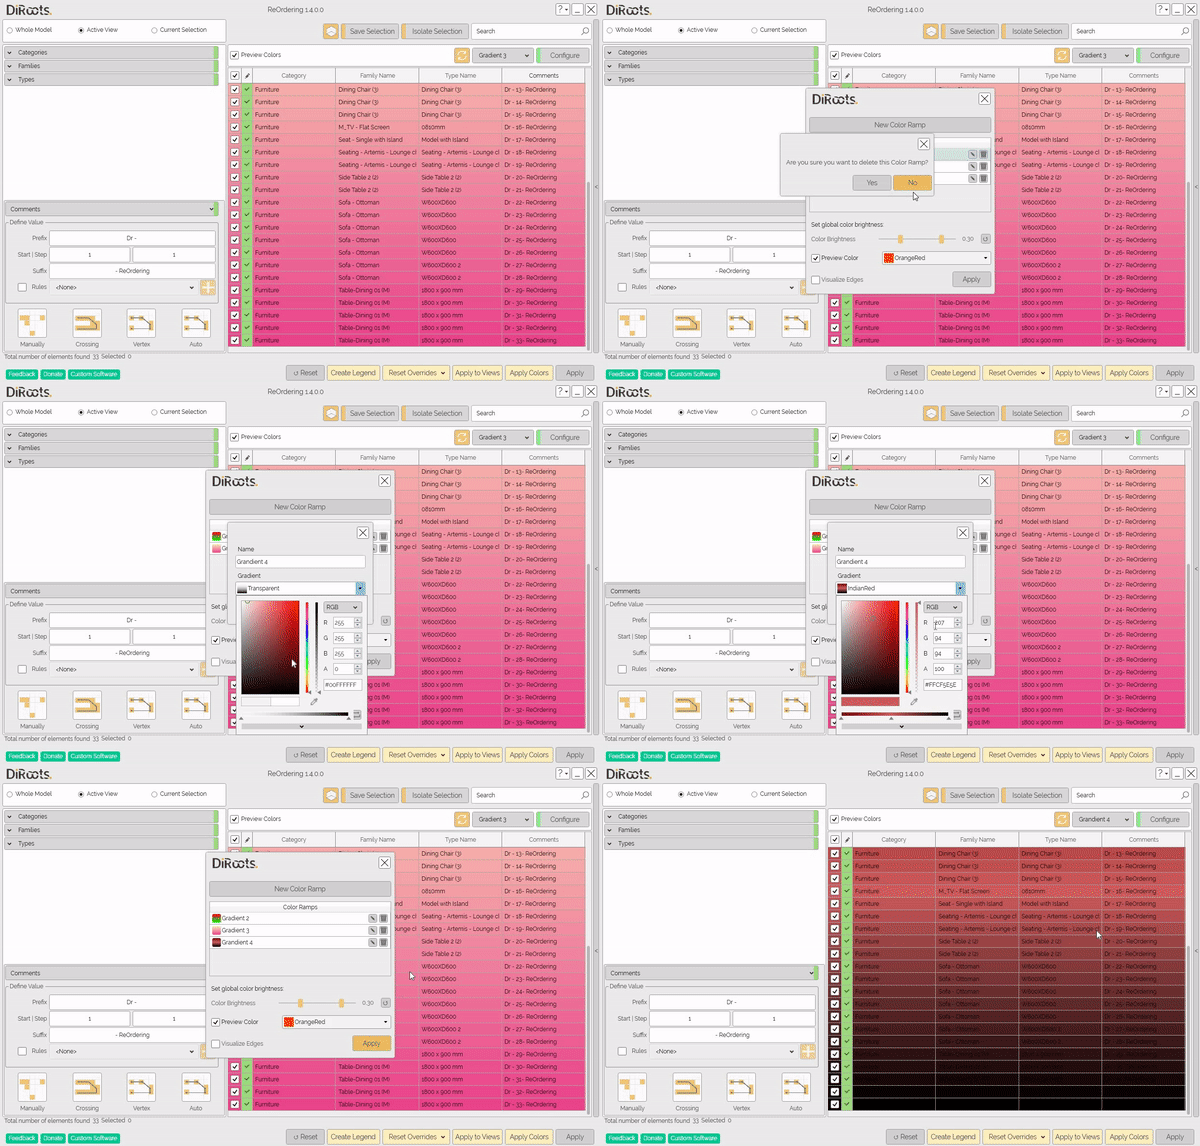
Click on the Configure button to edit or delete the current color ramps and create a new custom color ramp.
Note: the version on the image may not reflect the latest version of ReOrdering/DiRootsOne.
Apply Colors
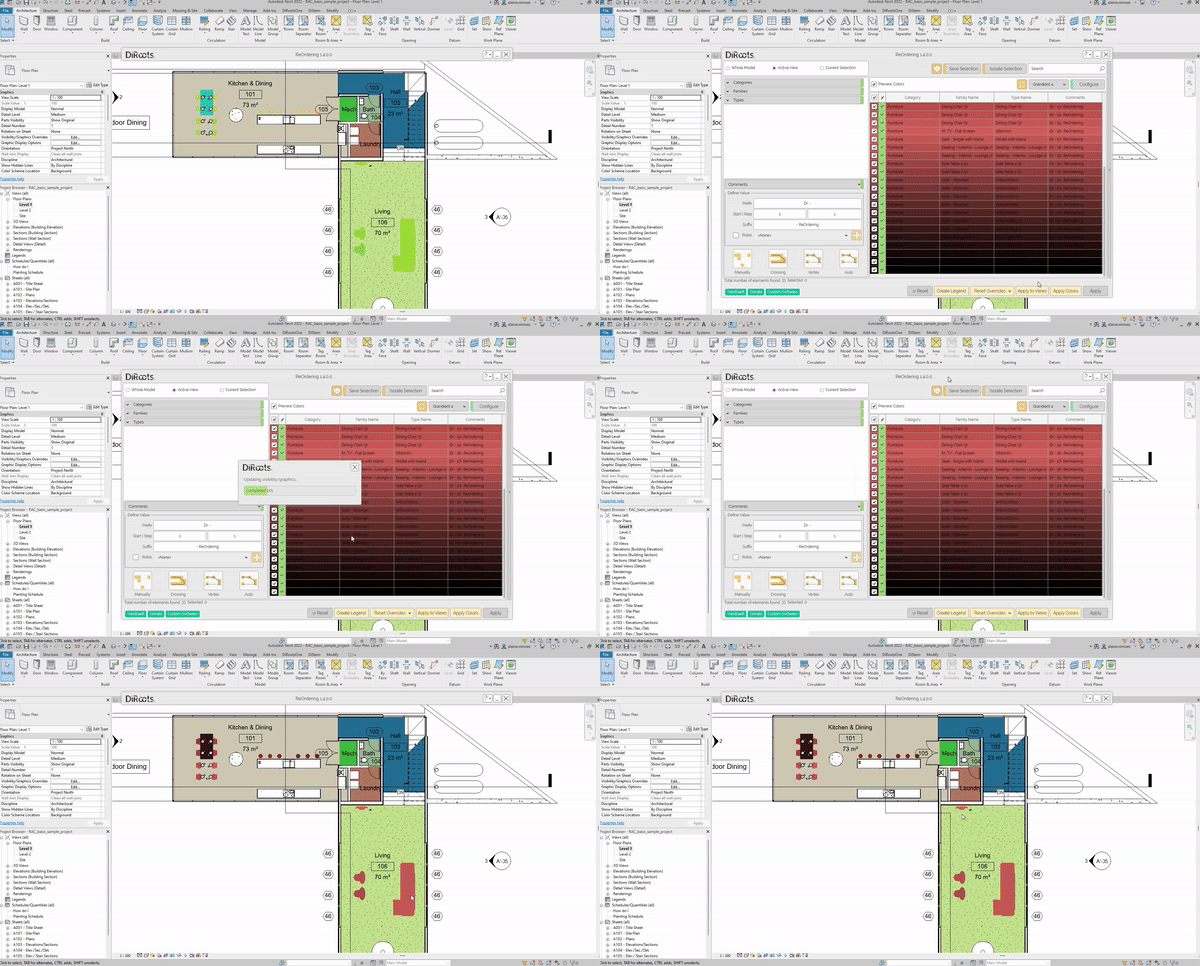
Select the Apply Colors button to add the current colors to the view model.
Note: the version on the image may not reflect the latest version of ReOrdering/DiRootsOne.
Apply to Views
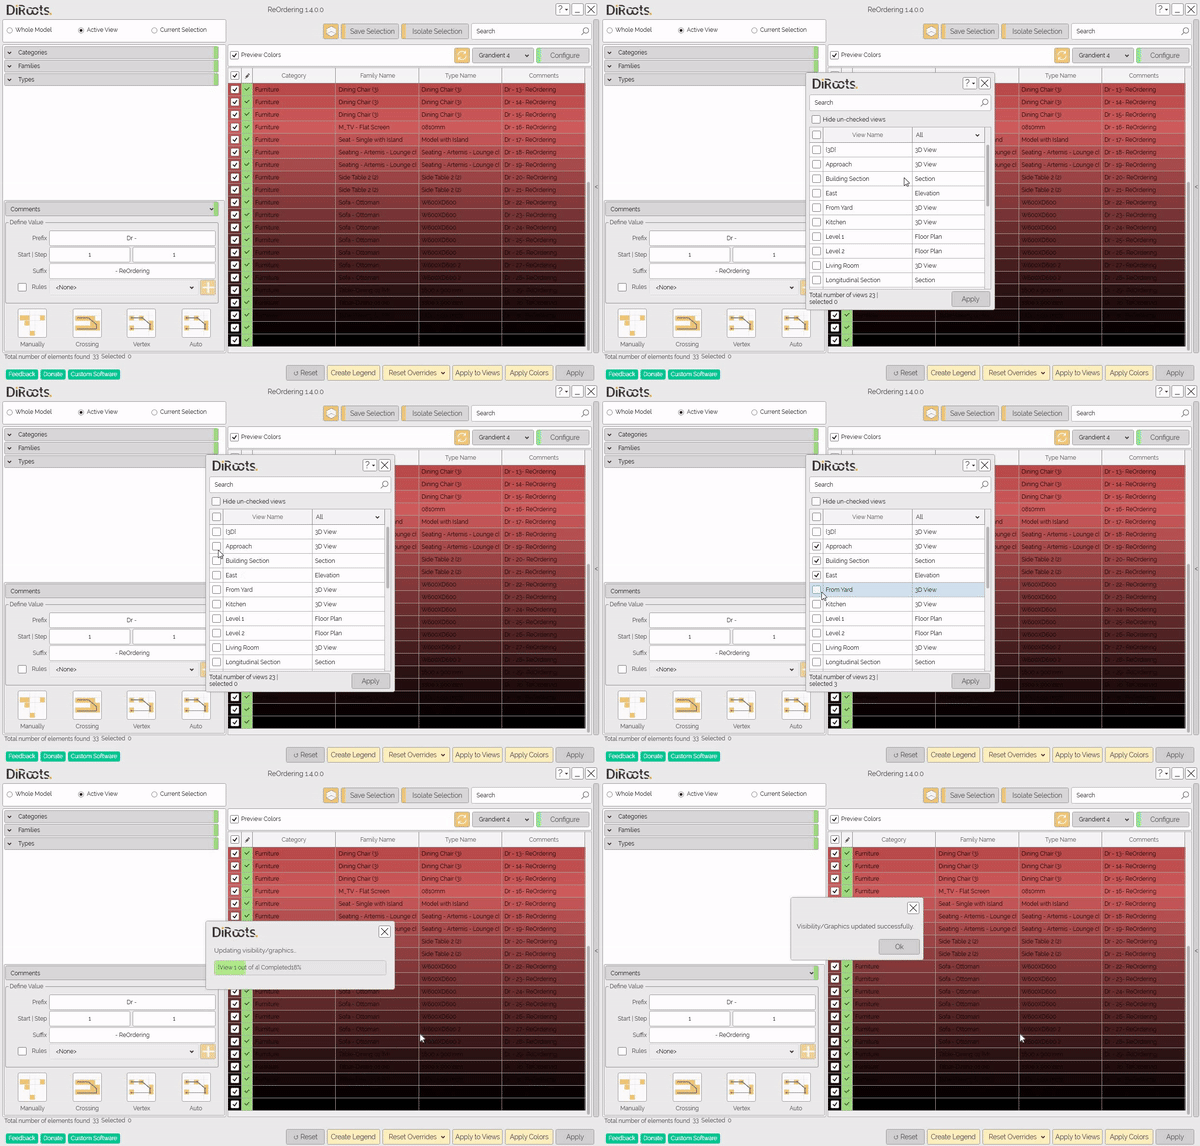
You can choose the views to which you want to apply the current colors. Select the views to add in this window and click Apply.
Note: the version on the image may not reflect the latest version of ReOrdering/DiRootsOne.
Update or duplicate view
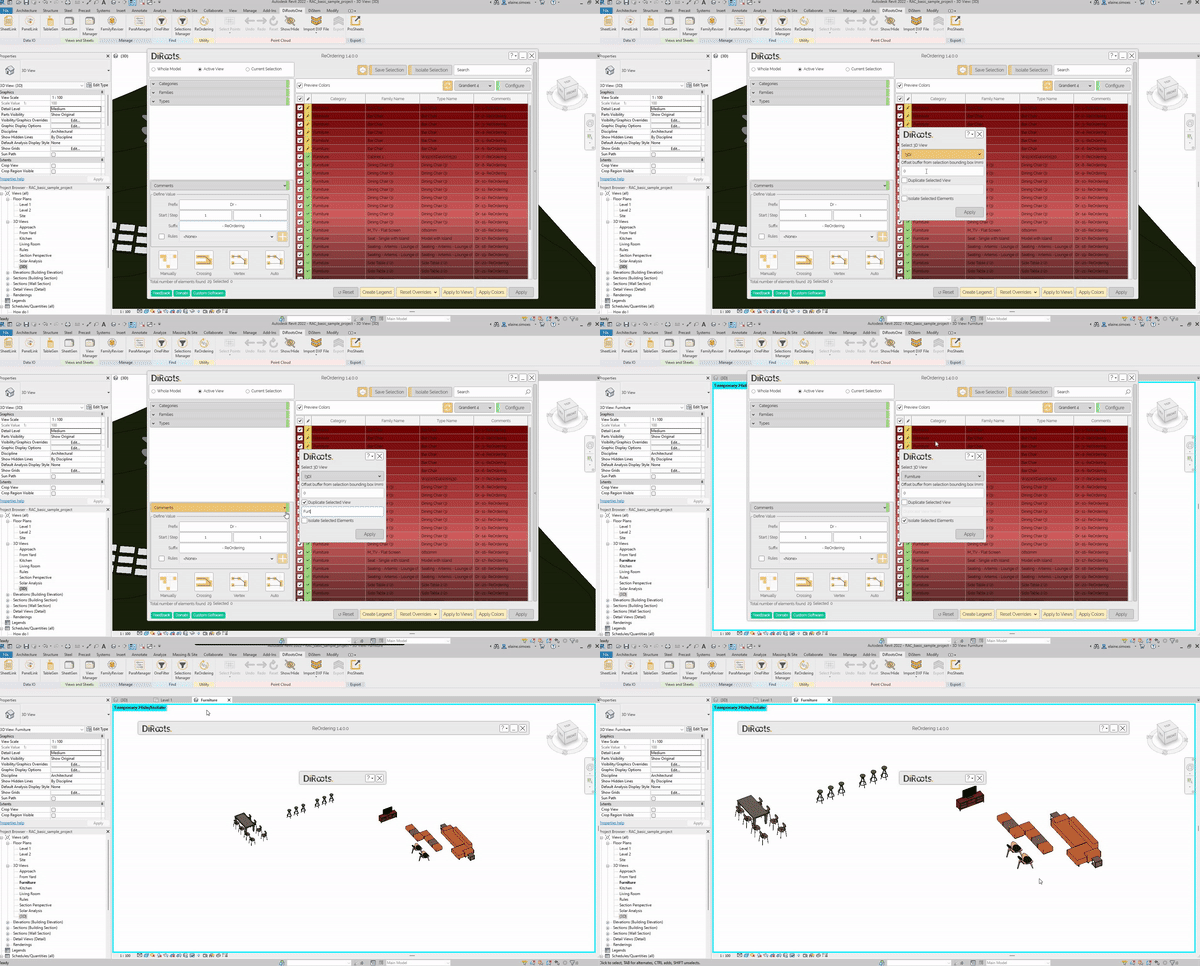
You have the ability to use existing or to duplicate 3D view. Visualize only filtered elements or all elements within Section Box with ability to define offset form marked elements.
- In the first list, select a view
- Set an Offset buffer from the section bounding box
- You can replace the selected view, or can select the Duplicate Selected View checkbox.
- Rename the duplicate view.
- Select the Isolate Selected Elements checkbox, to save the view with the isolated elements.
- Click the Apply button to finish.
Note: the version on the image may not reflect the latest version of ReOrdering/DiRootsOne.
Save Selection
Click on Save Selection button, and enter the name of the selection to save it. Note that, if you go to the Manage menu in Revit and click on the Load button, the new selection you have created will appear.
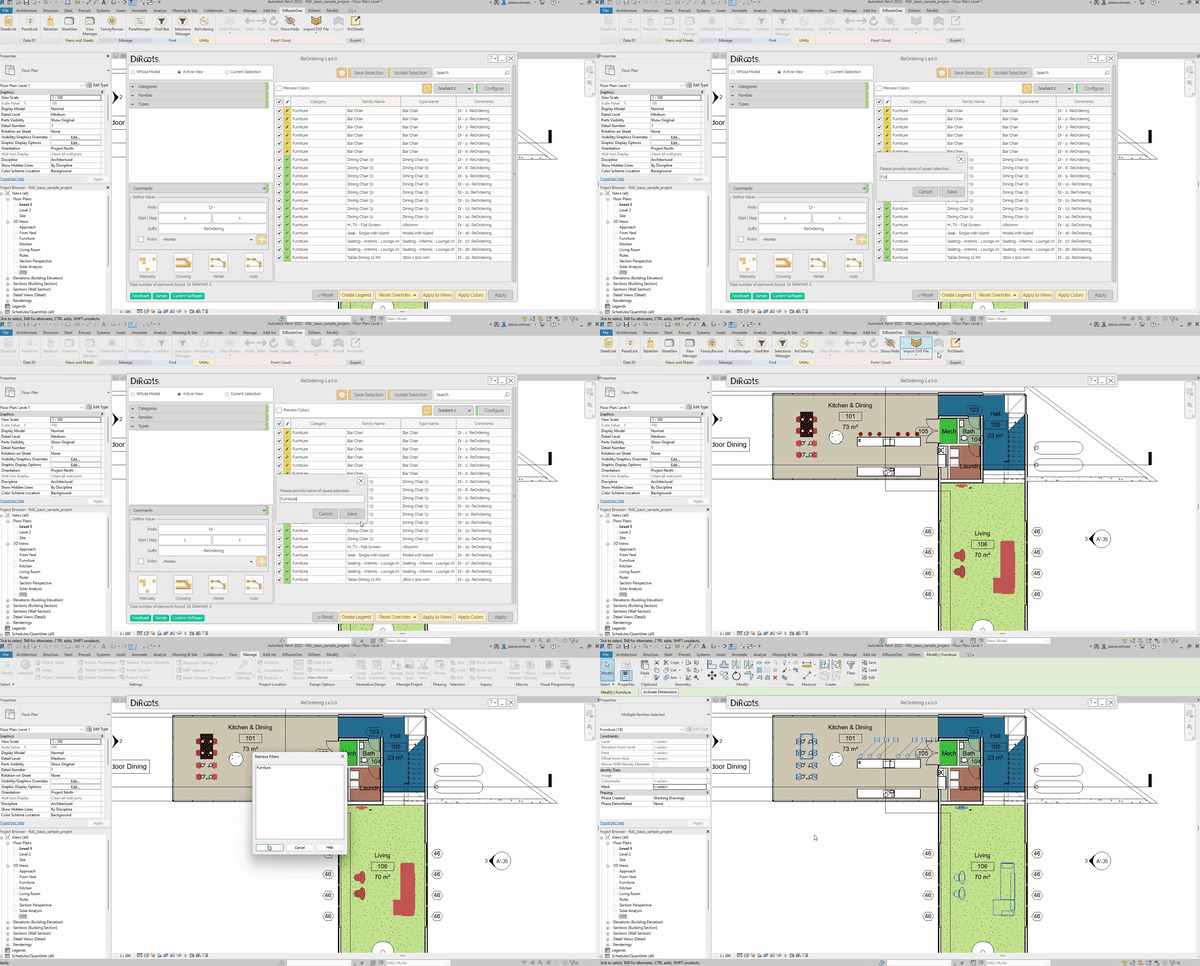
Note: the version on the image may not reflect the latest version of ReOrdering/DiRootsOne.
Isolate Selection
The Isolate Selection button, will isolate the filtered elements in a Temporary Hide/Isolate view. Click on Unisolate Selection to restore the view.
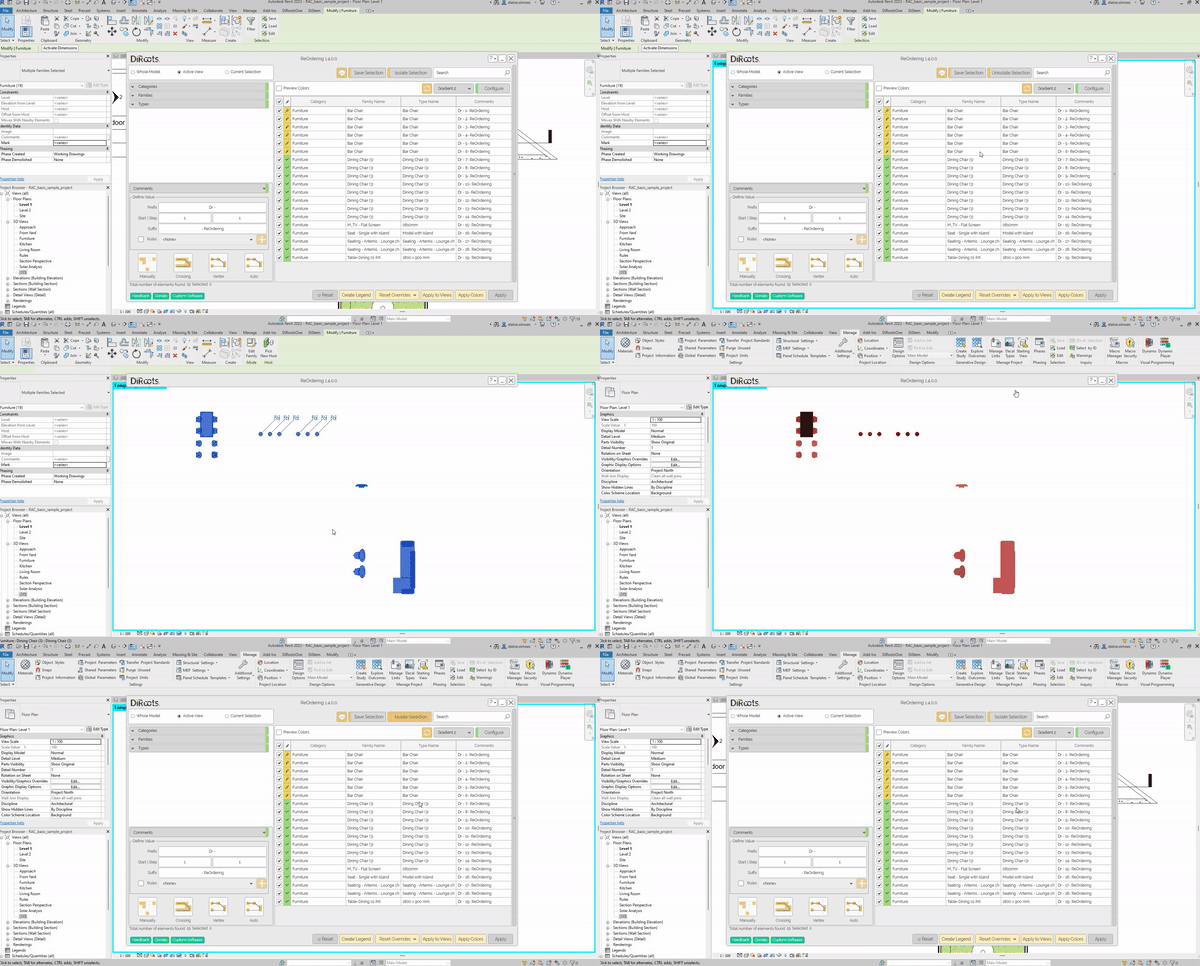
Note: the version on the image may not reflect the latest version of ReOrdering/DiRootsOne.
Reset
The Reset button will clear all the selected elements and the numbers assigned.
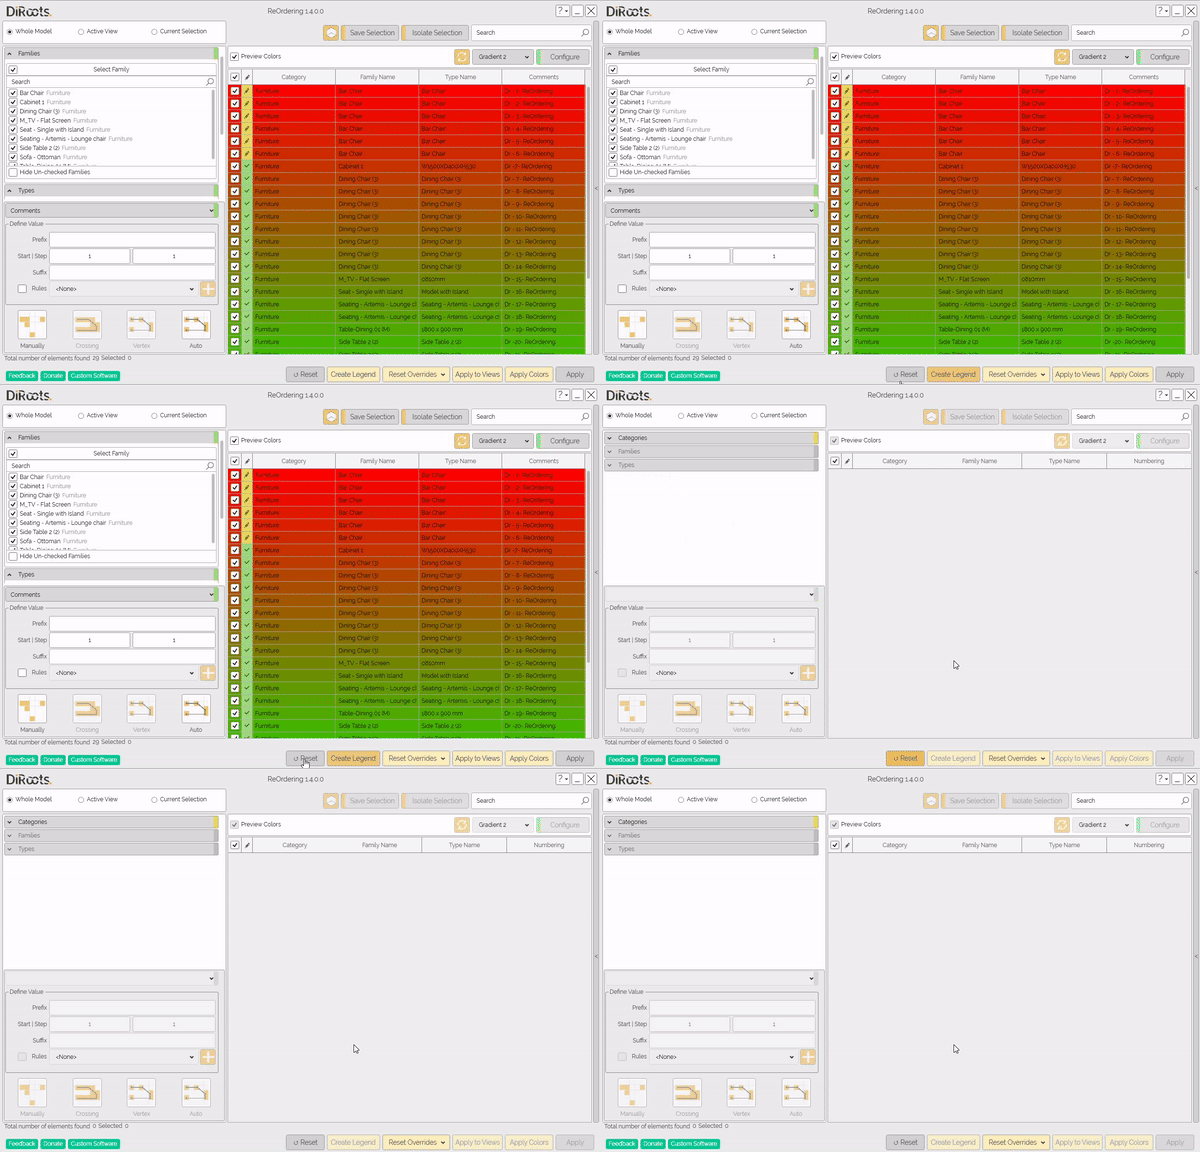
Note: the version on the image may not reflect the latest version of ReOrdering/DiRootsOne.
Reset Overrides
The Reset Overrides tool allows you to clear the colors applied to the views. You can choose to clear the current view or several views. When you select the multiple views option, a window will open for you to choose the views you want to clear, and then just click Reset Overrides. The views will then be restored to their original view.
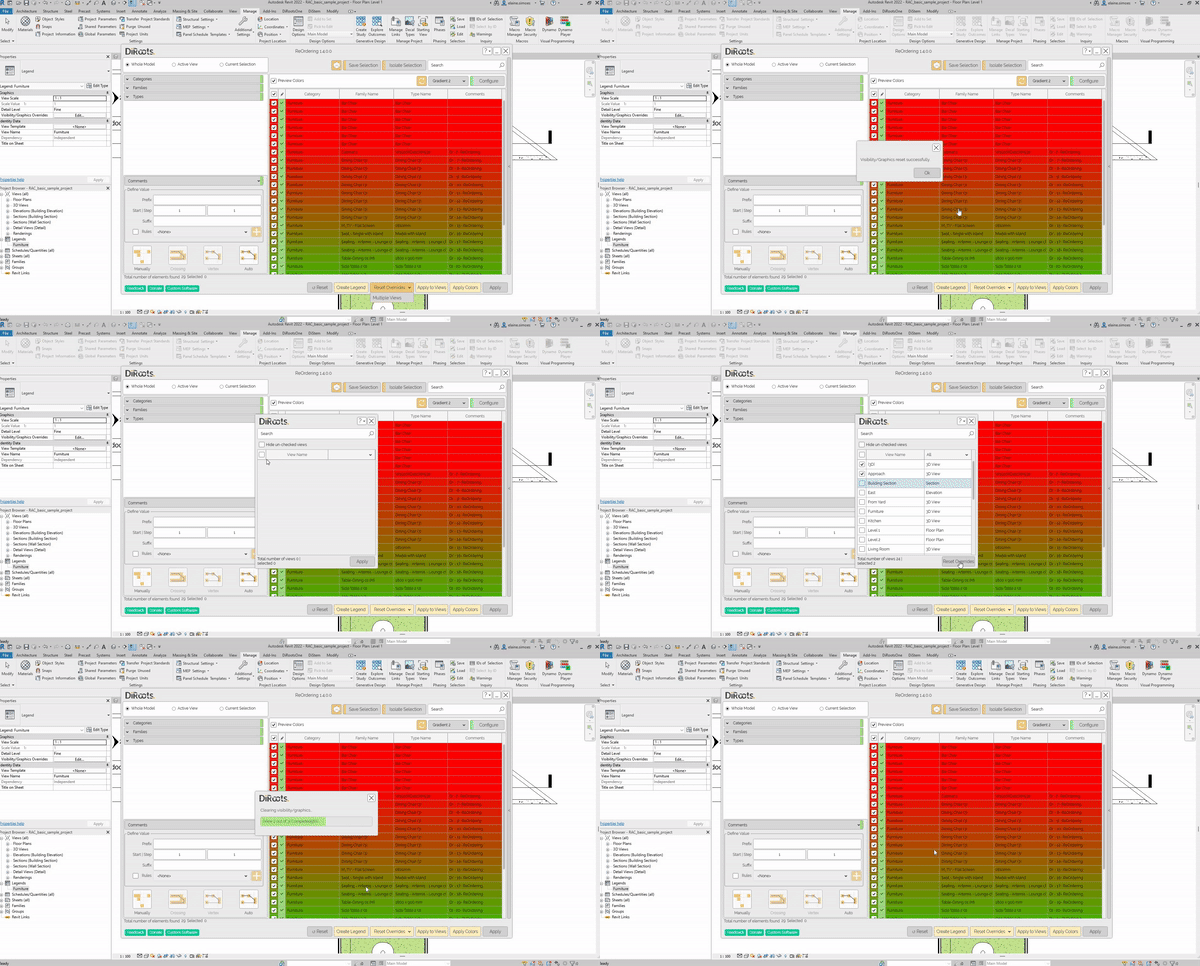
Note: the version on the image may not reflect the latest version of ReOrdering/DiRootsOne.
Create Legend
When you click on Create Legend, a window will open for you to enter a name for the legend, and whether you want to itemize instances. If you choose this option, you’ll have to select which columns you want to itemize. Once you’ve clicked Create, you can see the new legend you’ve created in the list of legends in the revit.
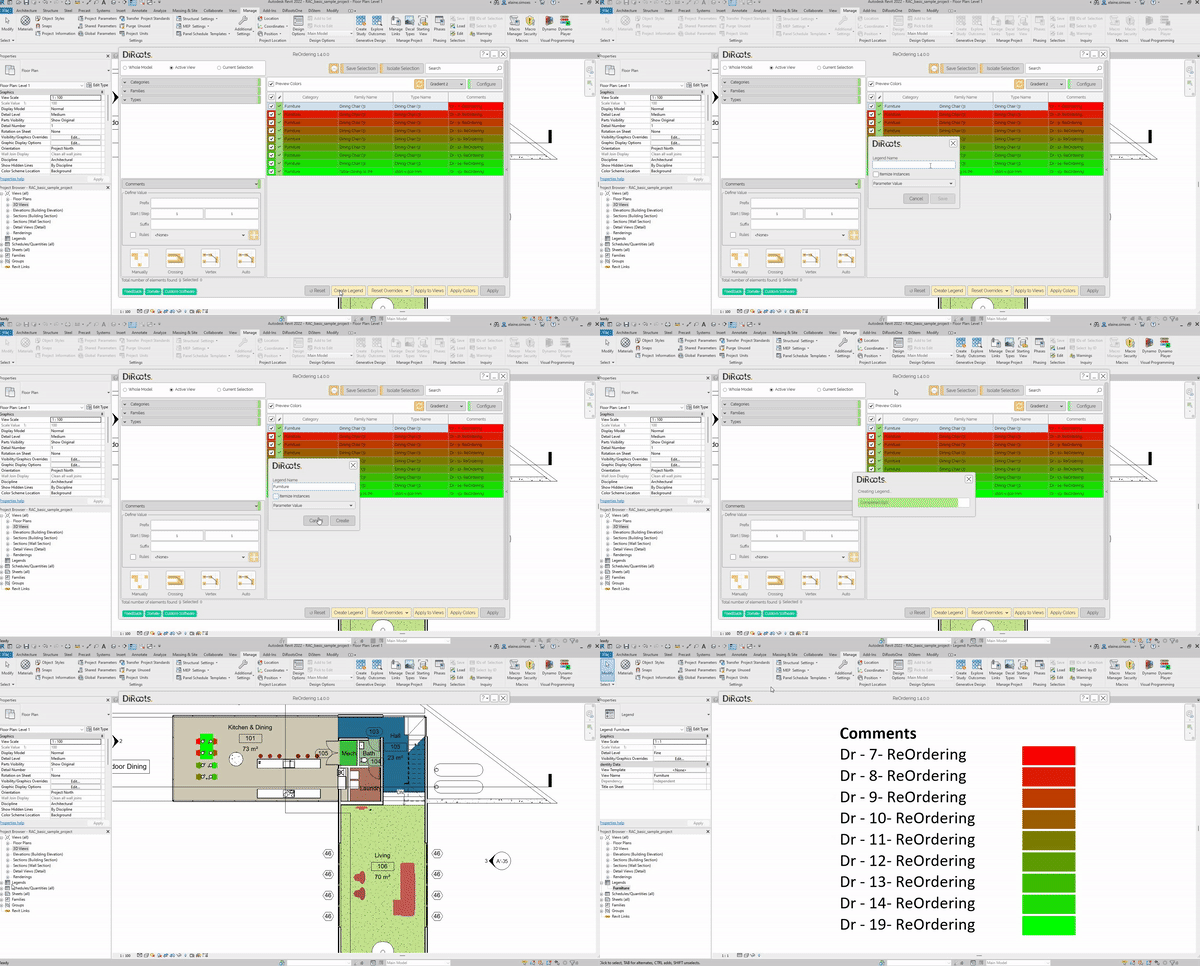
Note: the version on the image may not reflect the latest version of ReOrdering/DiRootsOne.
If you want to find out more about ReOrdering and explore detailed tutorials on how to use it, visit our YouTube channel. There, you’ll find a series of videos that can help answer questions and improve your knowledge. Be sure to check it out and subscribe to keep up to date with our news and tips!