ViewManager
Manage all the Views in your project, as well as View Templates and View Range settings in a single window.
Table of contents
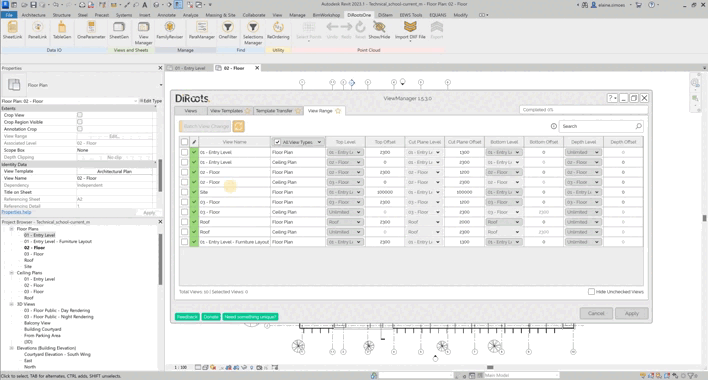
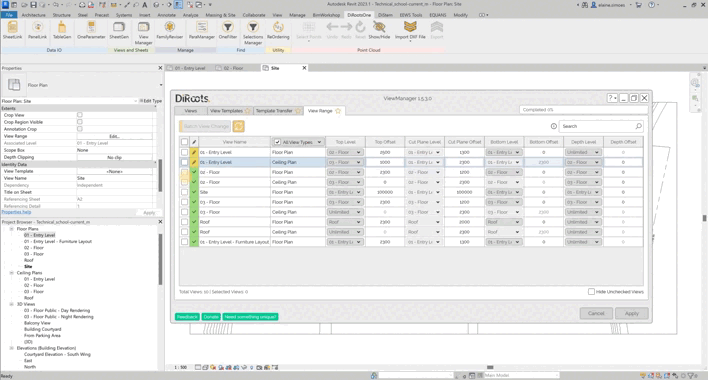
View Range tab
Manage the View Range of your Views individually or in batches in one place.
Manual actions
-
Right-click on the View and click to open View.
-
In the Levels columns open the drop-down list to change it.
-
Double-clik in the Offset cell and enter a value to assign to the View.
-
Filter View Types by selecting in the drop-down list in the View Type column header.
# Note:
Please note that all View Range settings made with the plug-in must respect Revit's view range rules. If the rules are not respected, the settings will not be applied and a warning will be displayed.
Note: the version on the image may not reflect the latest version of ViewManager/DiRootsOne.</sub
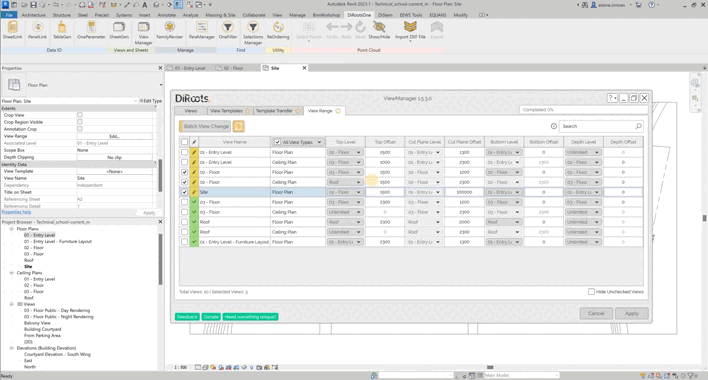
Batch View Change
Select multiple views and click to manage it in batch. In this window, you can also change the Top Level, Bottom Level, Depth Level and the Offsets from the selected views.
Note: the version on the image may not reflect the latest version of ViewManager/DiRootsOne.</sub
Clear all modifications
Click the Clear all Modifications button, and reset all edits applied to the view names and numbers, in the table view.
Note: the version on the image may not reflect the latest version of ViewManager/DiRootsOne.
# Tip:
Hover the mouse over the information icon for more details about the view range.
Note: the version on the image may not reflect the latest version of ViewManager/DiRootsOne.
If you want to find out more about ViewManager and explore detailed tutorials on how to use it, visit our YouTube channel. There, you’ll find a series of videos that can help answer questions and improve your knowledge. Be sure to check it out and subscribe to keep up to date with our news and tips!