QuickViews
The QuickViews allow you to create multiple views as Callouts, Elevations and Sections of internal rooms and spaces.
Core Features
- Create Callouts from rooms and spaces.
- Create Elevations and Sections from rooms and spaces.
- Update views in batches.
- Assign Shared Parameters to views.
Table of contents
- Whole Model or Active View
- Callout View
- Elevation and Section views
- Right-click actions
- Update Views
Whole Model or Active View
Select the radio button to manage rooms and spaces from the Whole Model or the Active View. Note that the table will show all the rooms and spaces for the currently selected option. In this table you can see the Project Name, Level, Number, Name, Rooms and Spaces, and the Status column shows whether any views have been created.
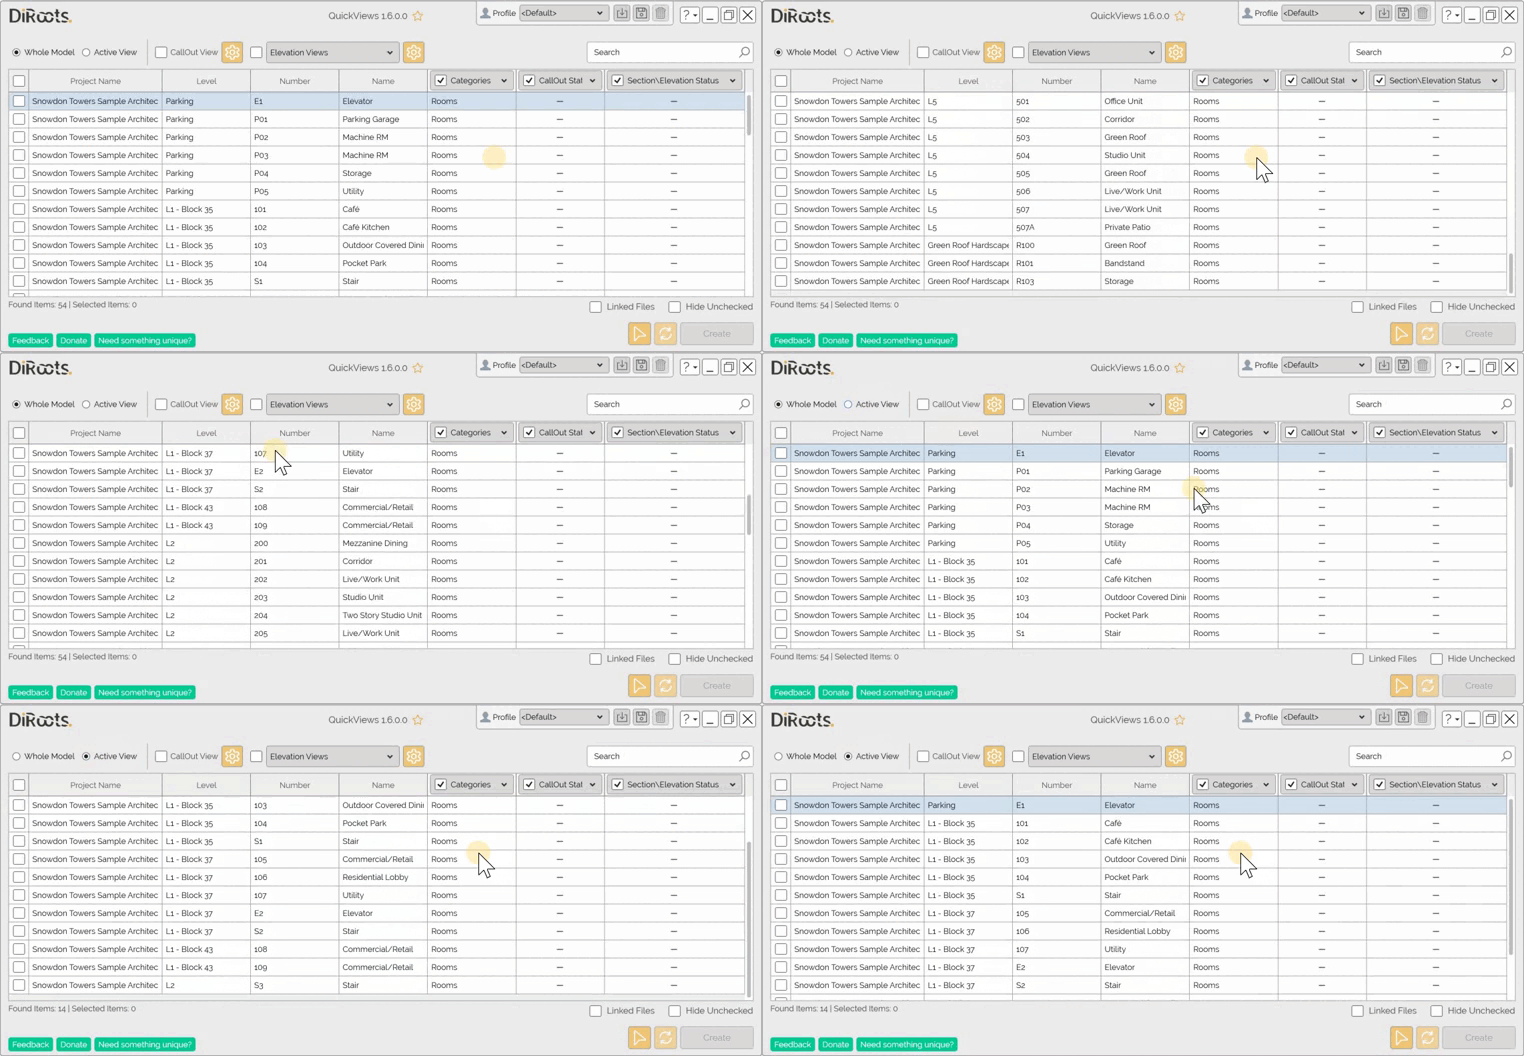
Note: the version on the image may not reflect the latest version of the application.
Filter Categories
In the header of the Categories column, filter Rooms and Spaces.
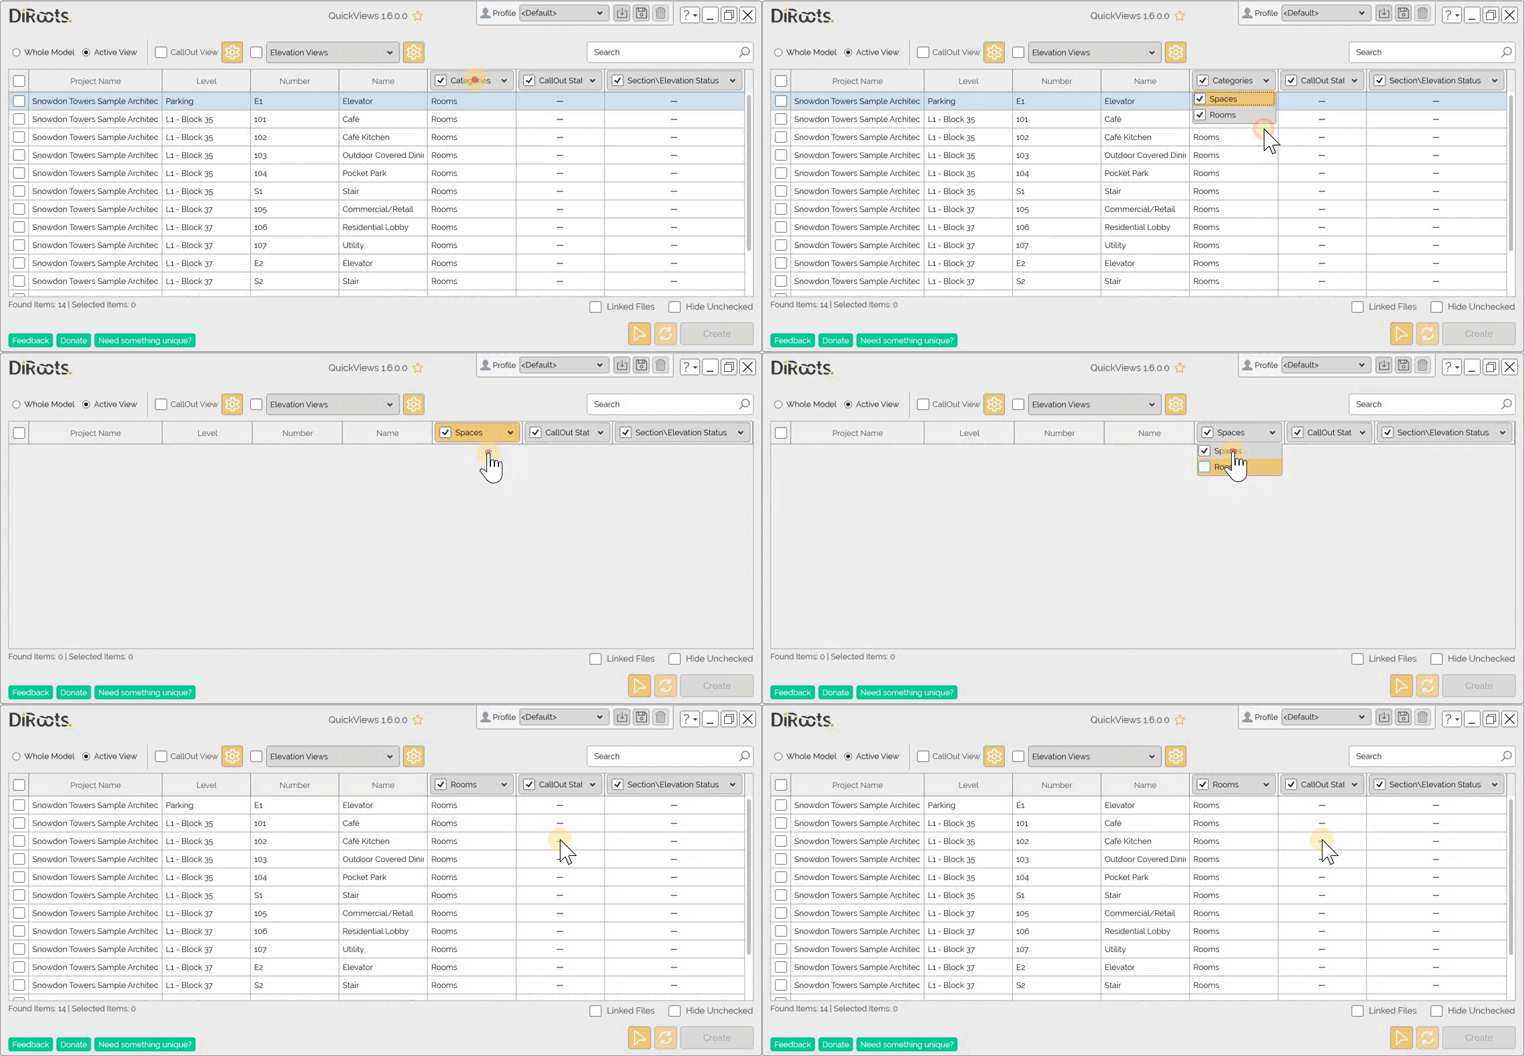
Note: the version on the image may not reflect the latest version of the application.
Linked Files
Select the Linked Files checkbox to also manage linked model rooms/spaces.
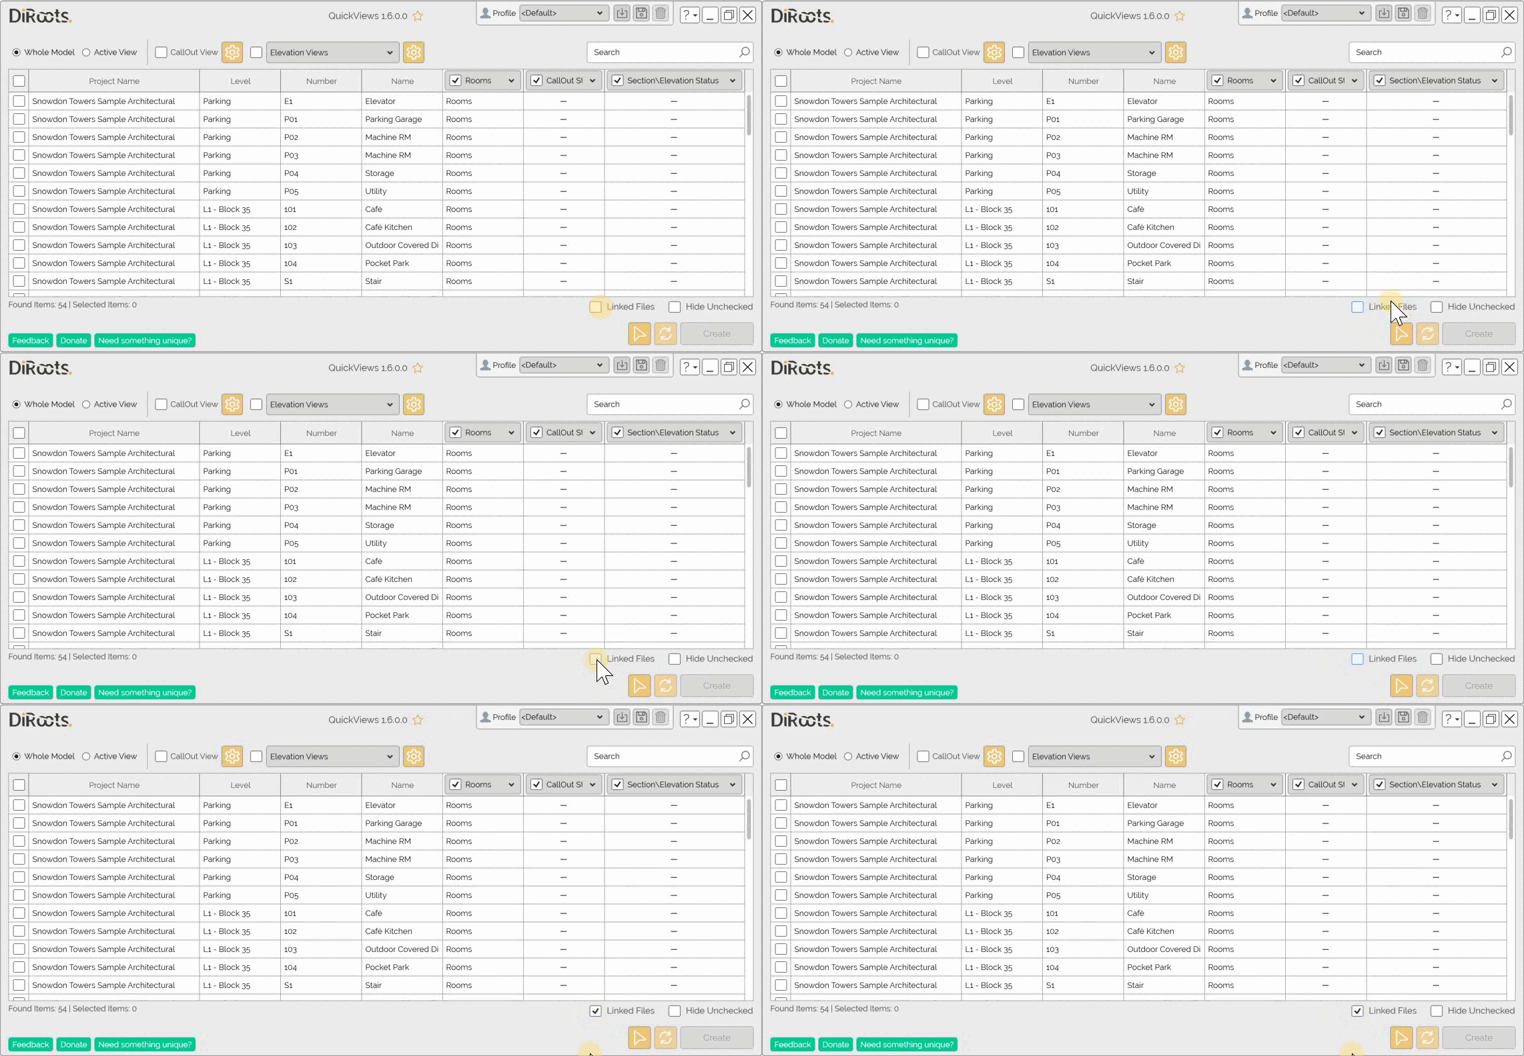
Note: the version on the image may not reflect the latest version of the application.
Status list
Use the Status list to filter the Callouts or Elevations/Sections views, created, not created or updated.
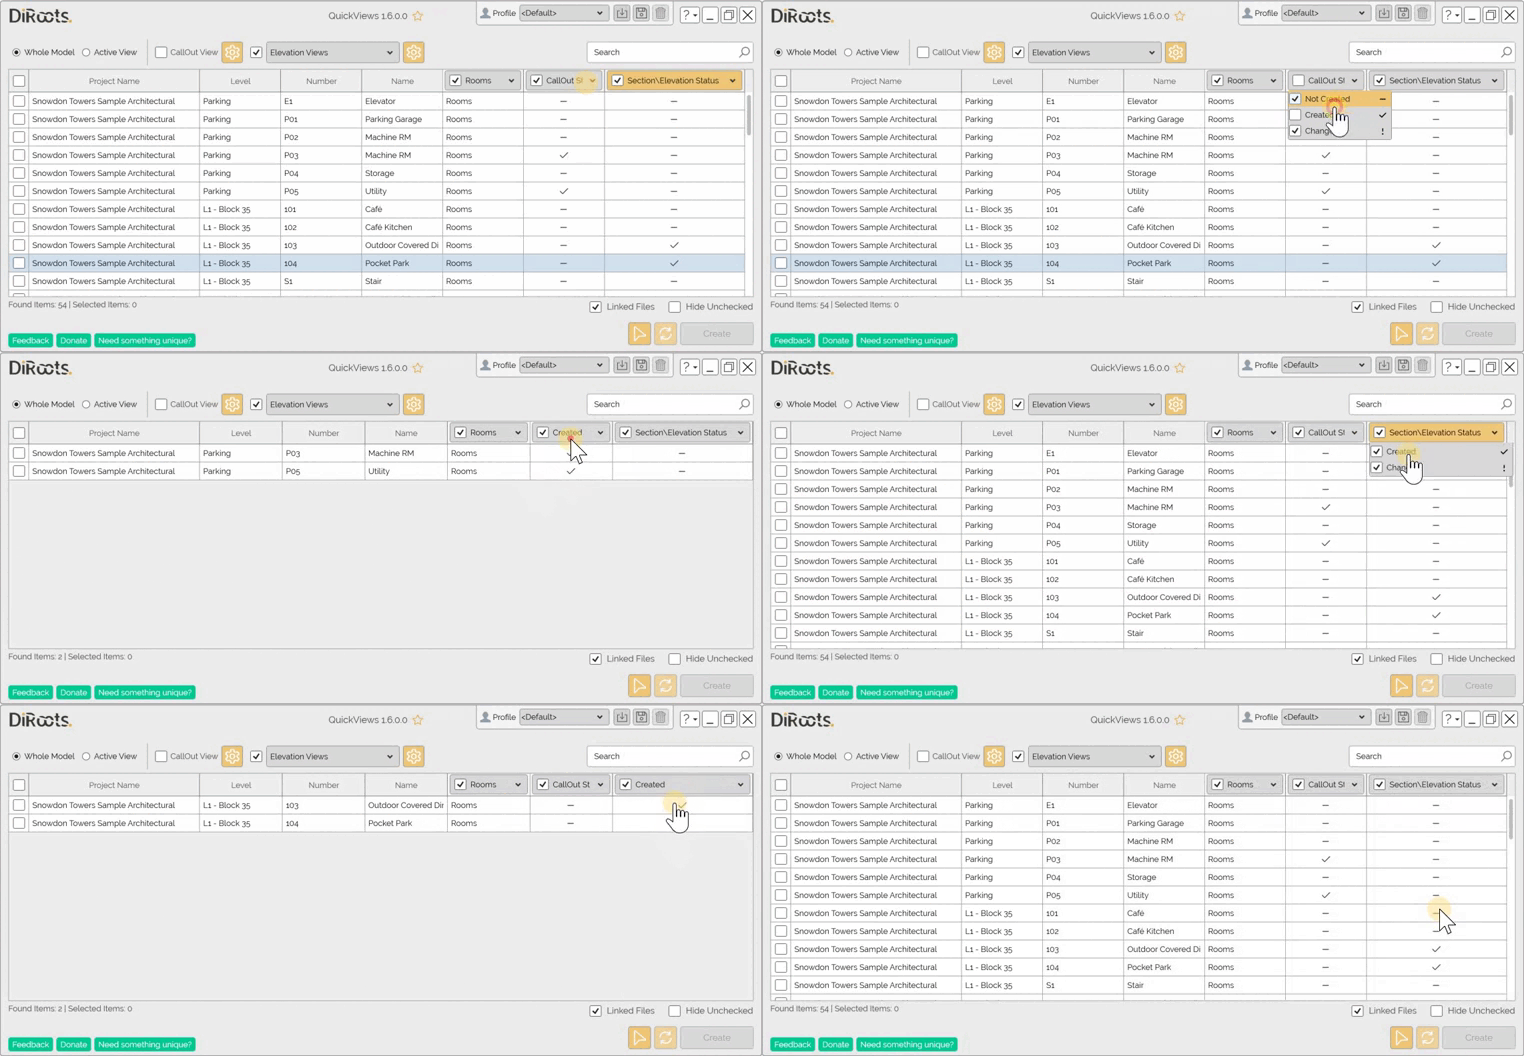
Note: the version on the image may not reflect the latest version of the application.
Callout View
Let’s create some Callouts Views. To do this, click on the Callout Settings button.
View tab
In this tab, you can manage all the details for creating Callout views.
-
Choose the Callout Type
-
Select a scale to apply to the views.
-
Set a level of detail to create the views.
-
Select the Phase of the view.
-
If you want, select a View Template to create it. Note that if a View Template is selected, its settings will override the settings assigned in this window.
-
Set a value for Offset from Callout boudary.
-
Choose whether you want the Callout boudary to be a rectangle or aligned with room/space boundary.
#Note:
Use the Info icon to see the example of the boudaries.
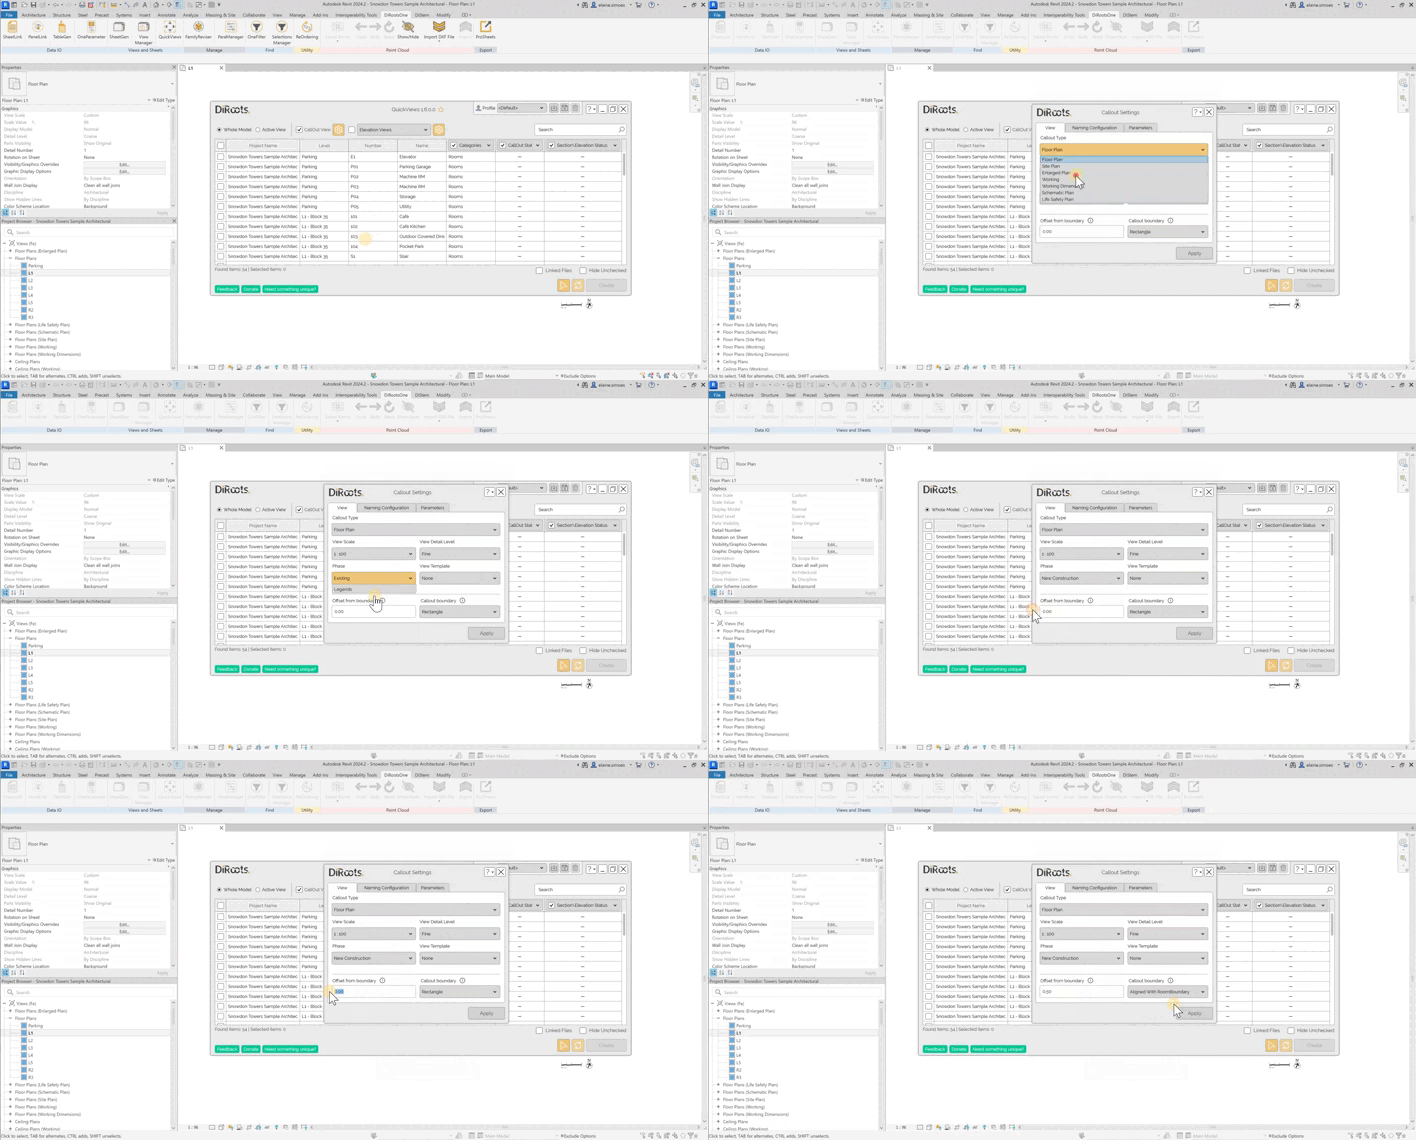
Note: the version on the image may not reflect the latest version of the application.
Naming Configuration tab
Let’s customize the name of the views.
In the first table, you can see all the existing parameters that you can use to name the views. Select the parameters you want, and click on the arrow button to assign them to the Selected Parameters table. You can also sort the Selected Parameters using the arrows below the table.
#Note:
Use the checkbox to also see the Project Information parameters.
#Note:
Select the checkbox to add a default Field Separator between the selected parameters.
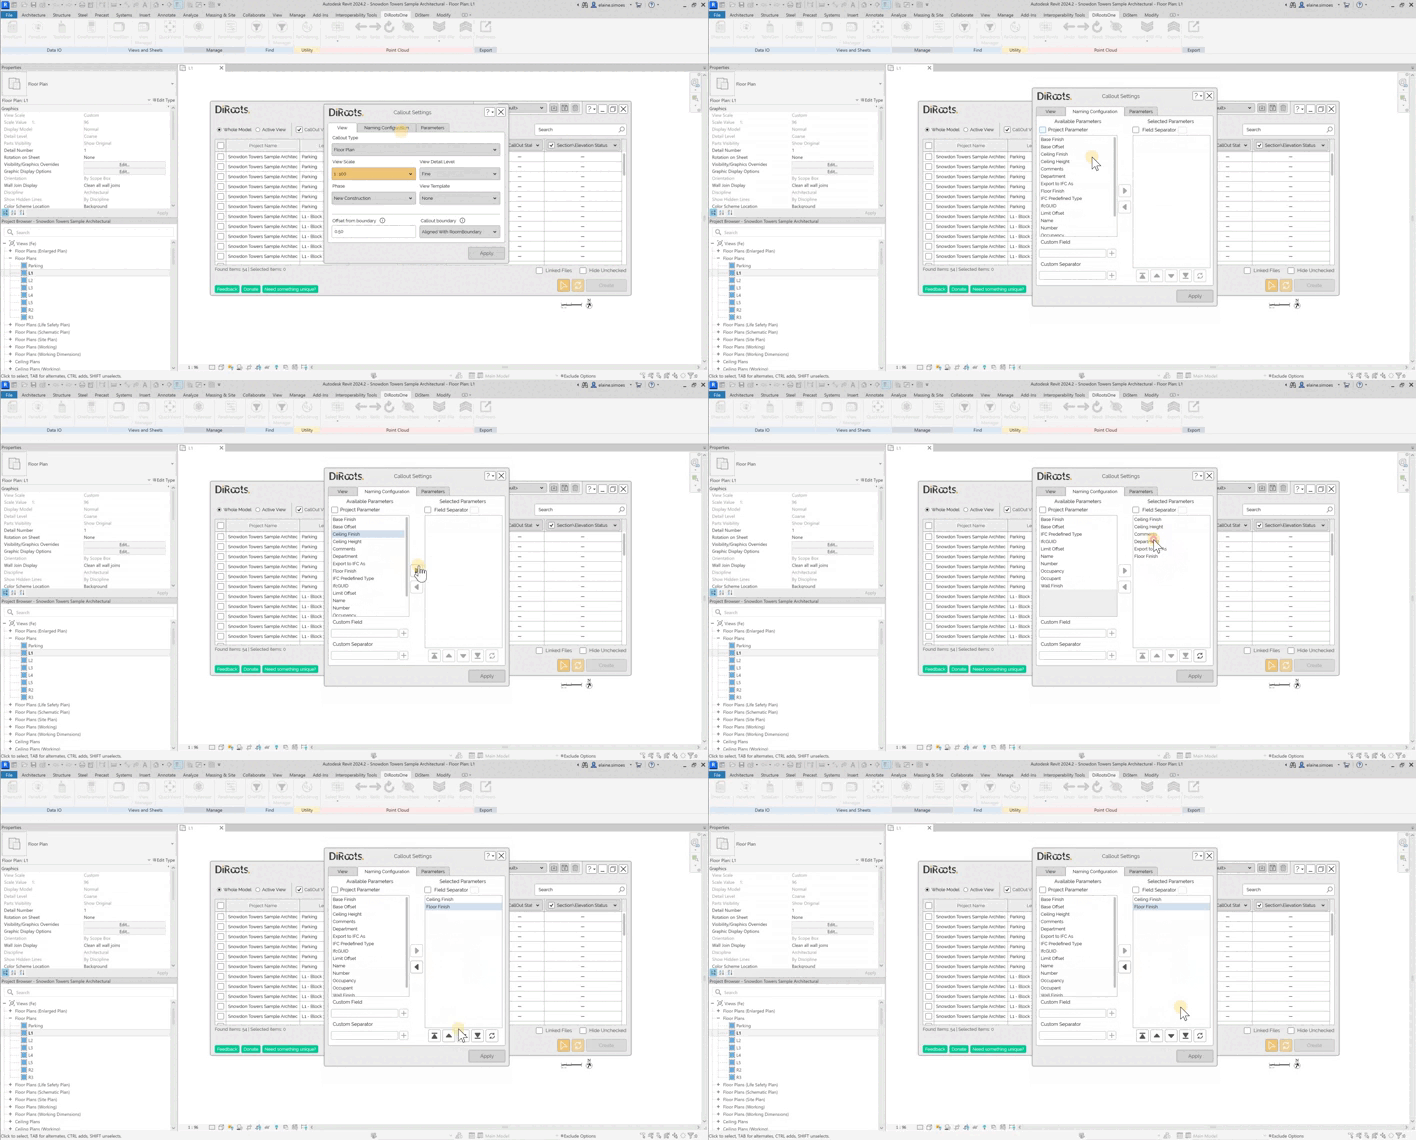
Note: the version on the image may not reflect the latest version of the application.
-
Enter Custom Field to name the views.
-
Enter Custom Separator between the parameters to be named.
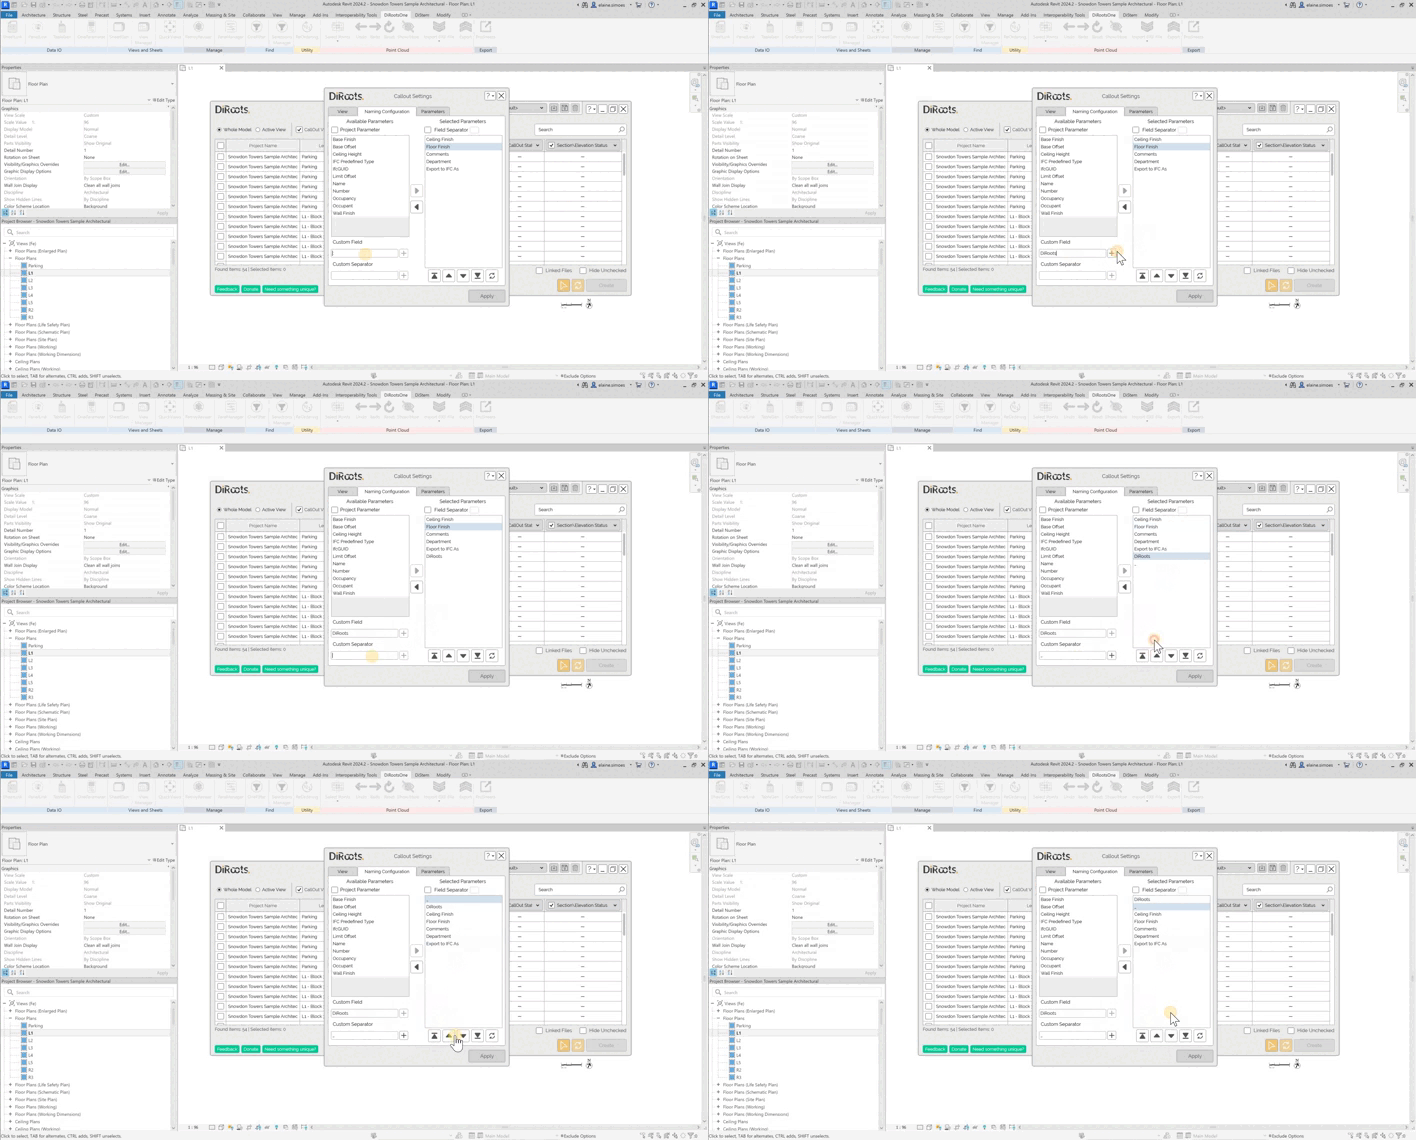
Note: the version on the image may not reflect the latest version of the application.
Parameters tab
To manage this tab you need to create at least one Shared Parameter from the Views category. Then, click on Add button to add a Shared Parameter to the views you are going to create. Once you have added it, open the list to select the parameter and in the second column, assign it a value.
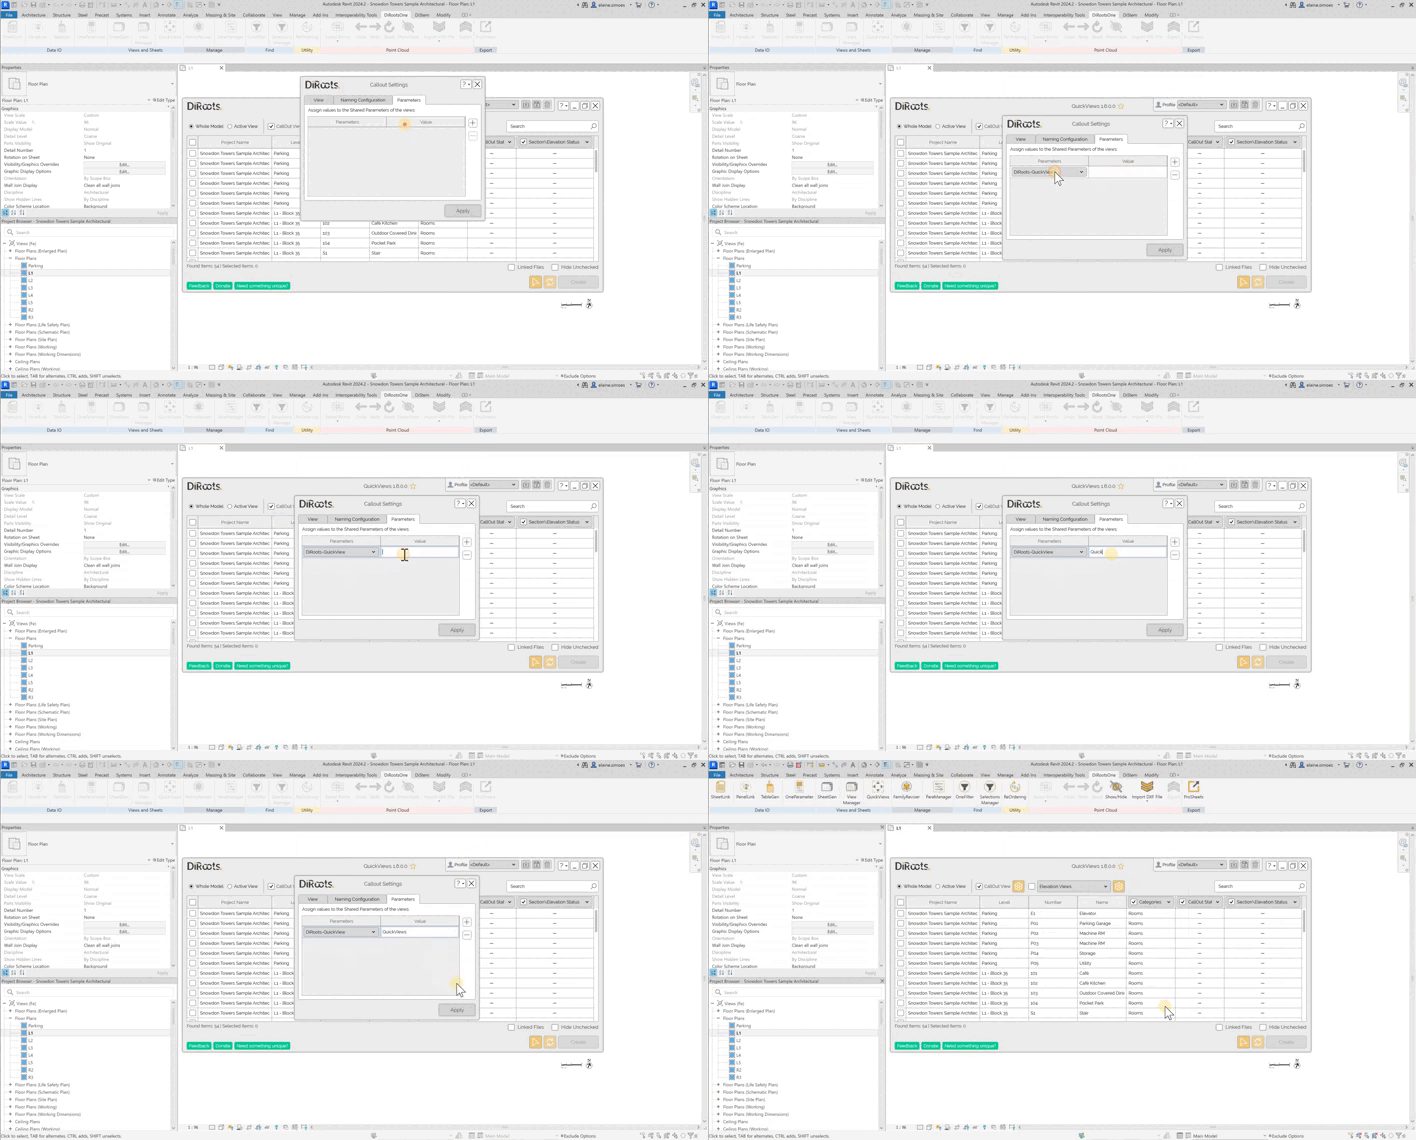
Note: the version on the image may not reflect the latest version of the application.
Save settings
Click on Apply to save the settings and then select the rooms and spaces for which you want to create the callout views. To finish, click on the Create button and wait a few seconds for the views to be created.
#Note:
You can also use the Select rooms/spaces buttons to choose them manually.
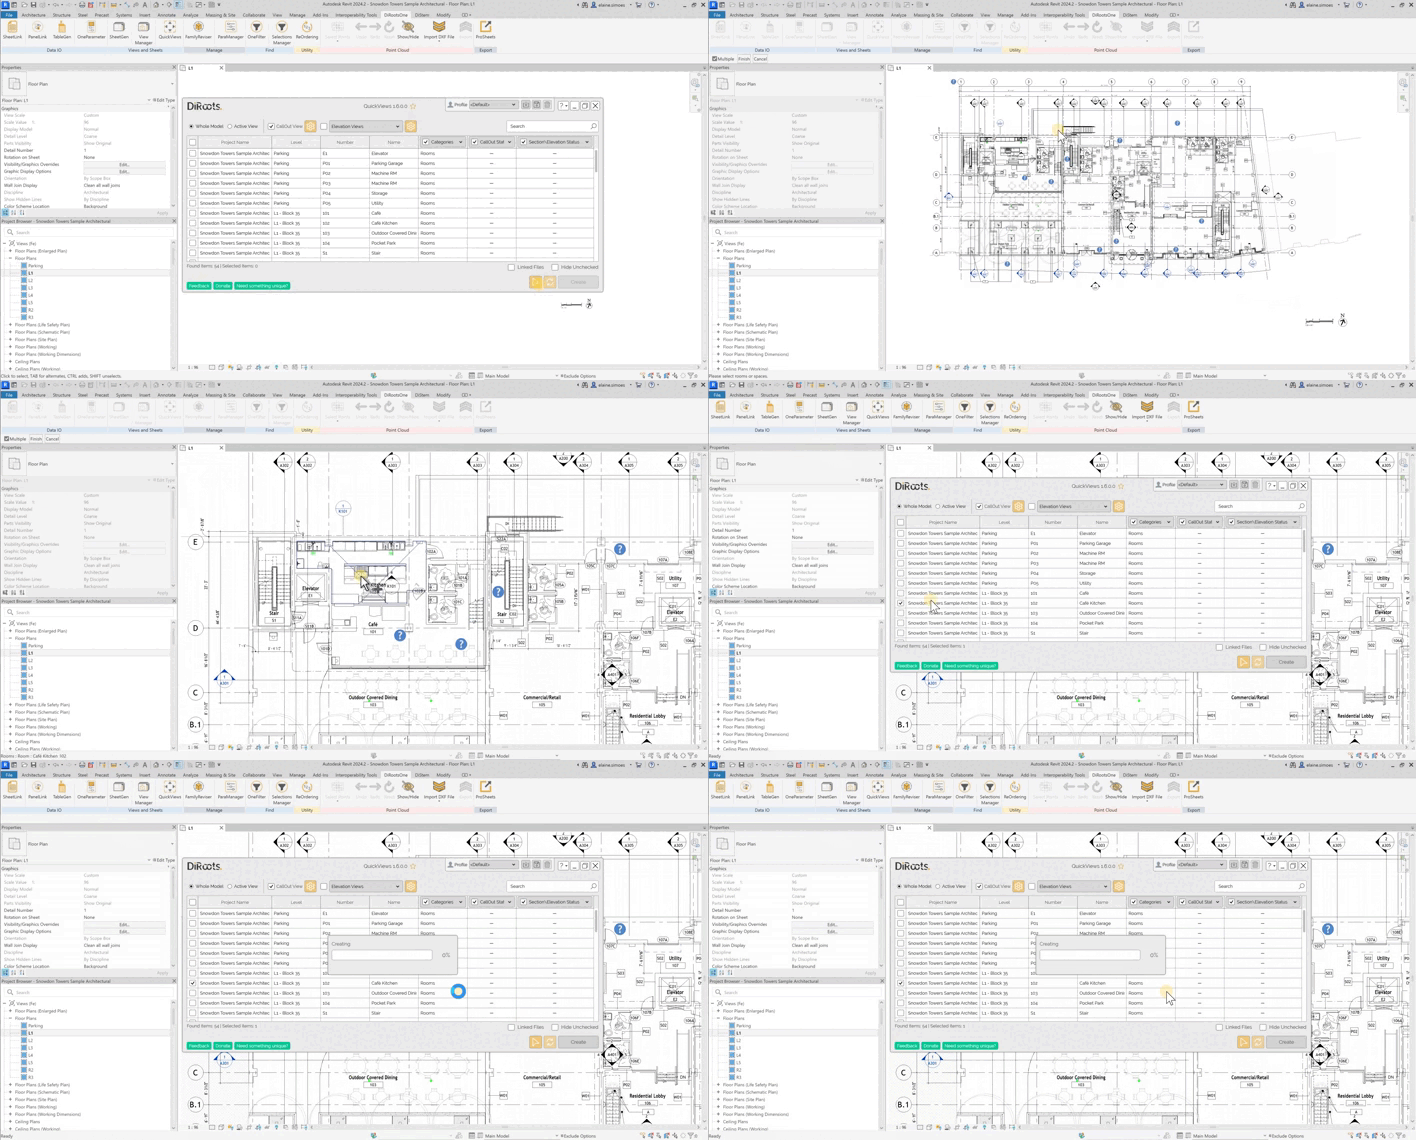
Note: the version on the image may not reflect the latest version of the application.
Elevation and Section views
Let’s create some Elevation and Section views. To do this, select from the list whether you want to create elevation or section views and click on the Settings button.
View tab
In this tab, you can manage all the details for creating the views.
-
Choose the Elevation/Section Type.
-
Select a scale to apply to the views.
-
Define the level of detail to create the views.
-
Choose the Phase from view.
-
If you want, select a View Template to create it. Note that if a View Template is selected, its settings will override the settings assigned in this window.
-
Select the checkbox to Join Elevation Views into Single Marker. If the room is square or retangle, this option places all the views on a single marker.
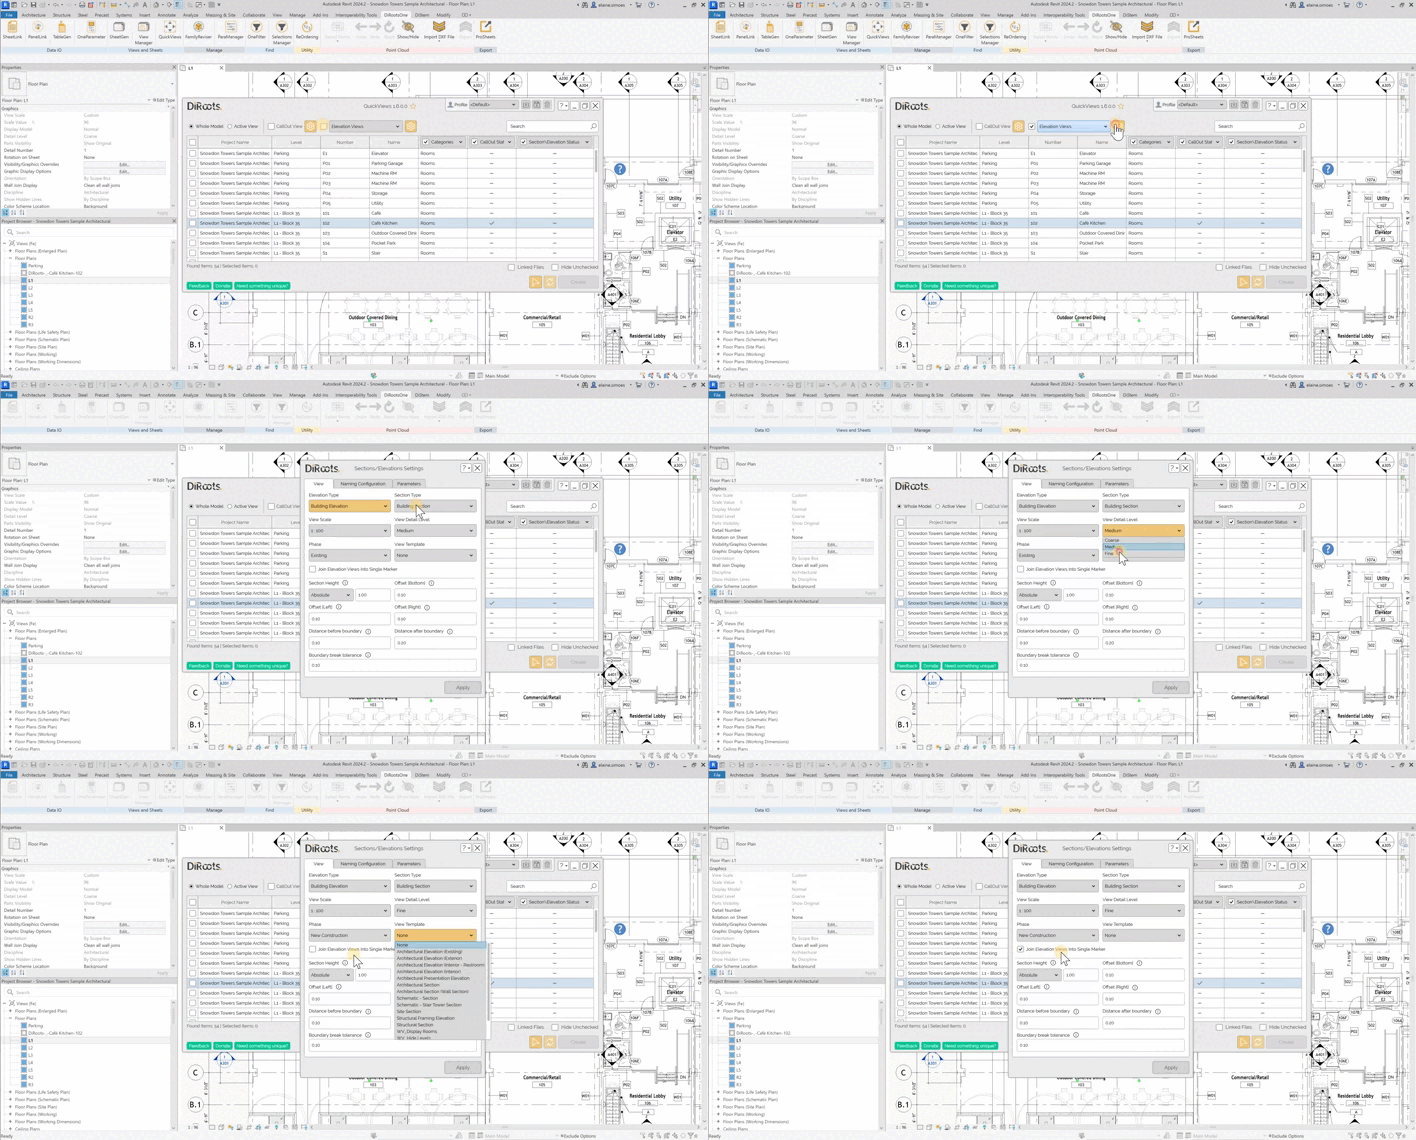
Note: the version on the image may not reflect the latest version of the application.
Now let’s define the section height and offsets to the rooms and spaces.
-
Section Height- open the list and choose if you want to apply the value From Instance or Absoulte, and then define de value to apply it.
-
Define the Offset Bottom value.
-
Enter an Offset Left value.
-
Enter an Offset Right value.
-
Define the distance before boundary.
-
Define the distance after boundary.
-
To conclude, define a Boundary break tolerance. For example, if there are small walls in the room, you can assign a tolerance value to create the views. Whether you want to create a view for each small wall, or a general view, without taking these smaller values into account.
#Note:
Use the Info icon to see the boudaries and Offsets examples.
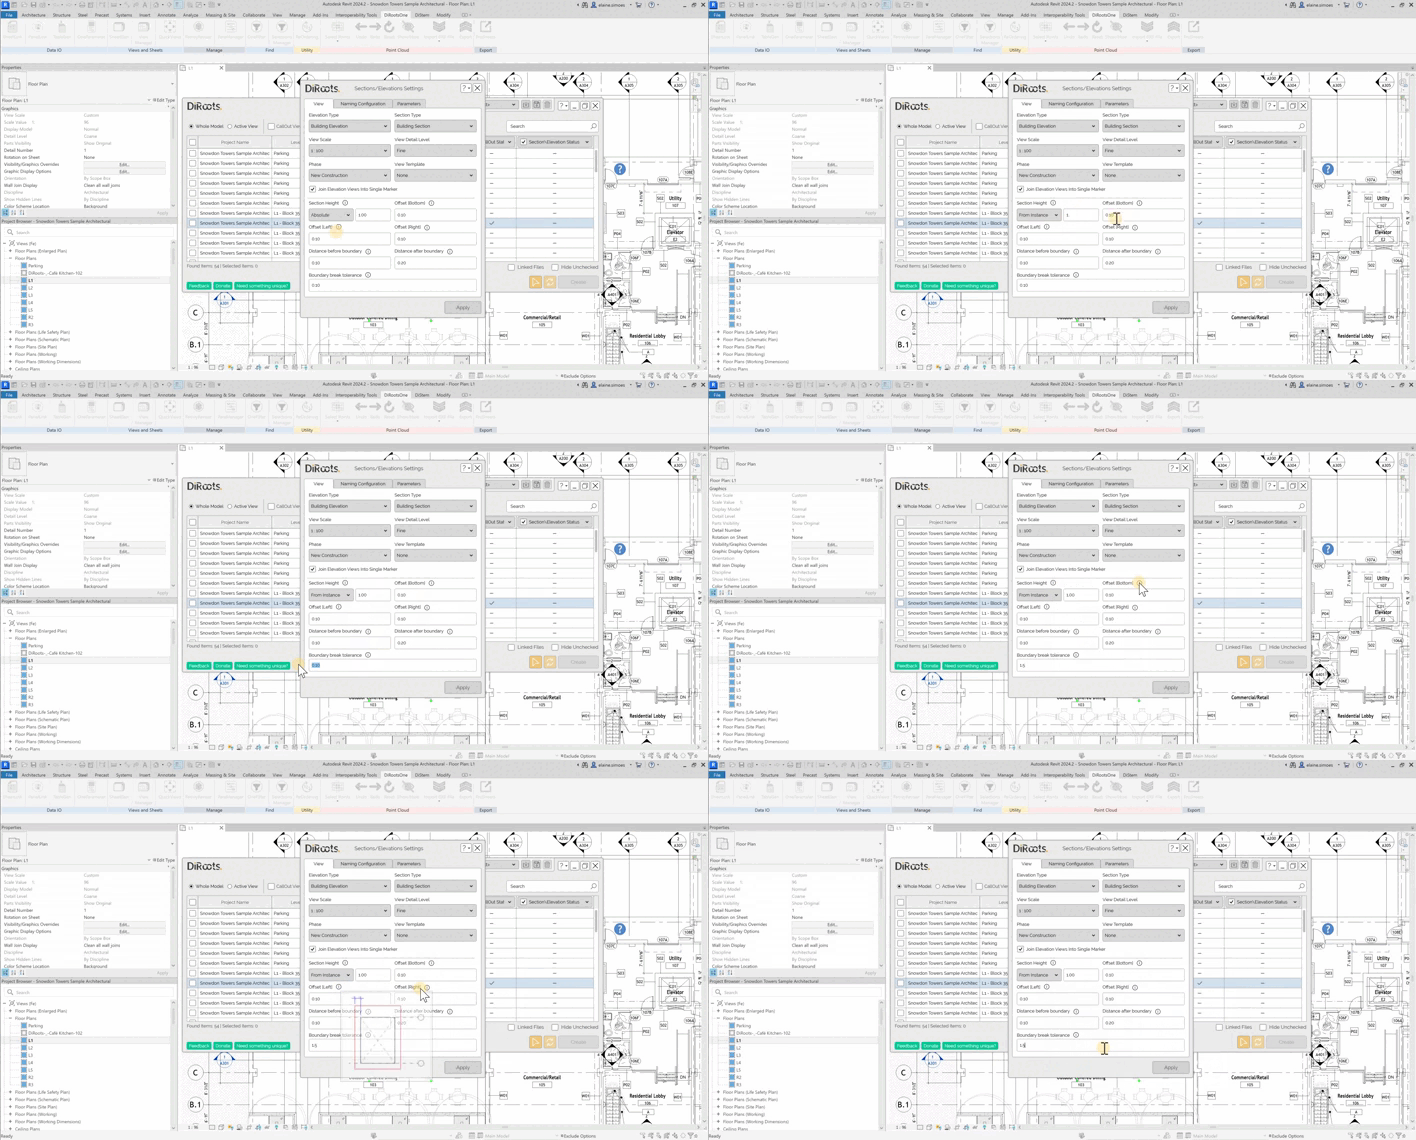
Note: the version on the image may not reflect the latest version of the application.
Naming Configuration tab
Let’s customize the names of the views.
In the first table, you can see all the existing parameters that you can use to name the views. Select the parameters you want, and click on the arrow button to assign them to the Selected Parameters table. You can also sort the Selected Parameters using the arrows below the table.
#Note:
Use the checkbox to also see the Project Information parameters.
#Note:
Select the checkbox to add a default Field Separator between the selected parameters.
-
Enter Custom Fields to name the views.
-
Enter Custom Separators between the parameters to name.
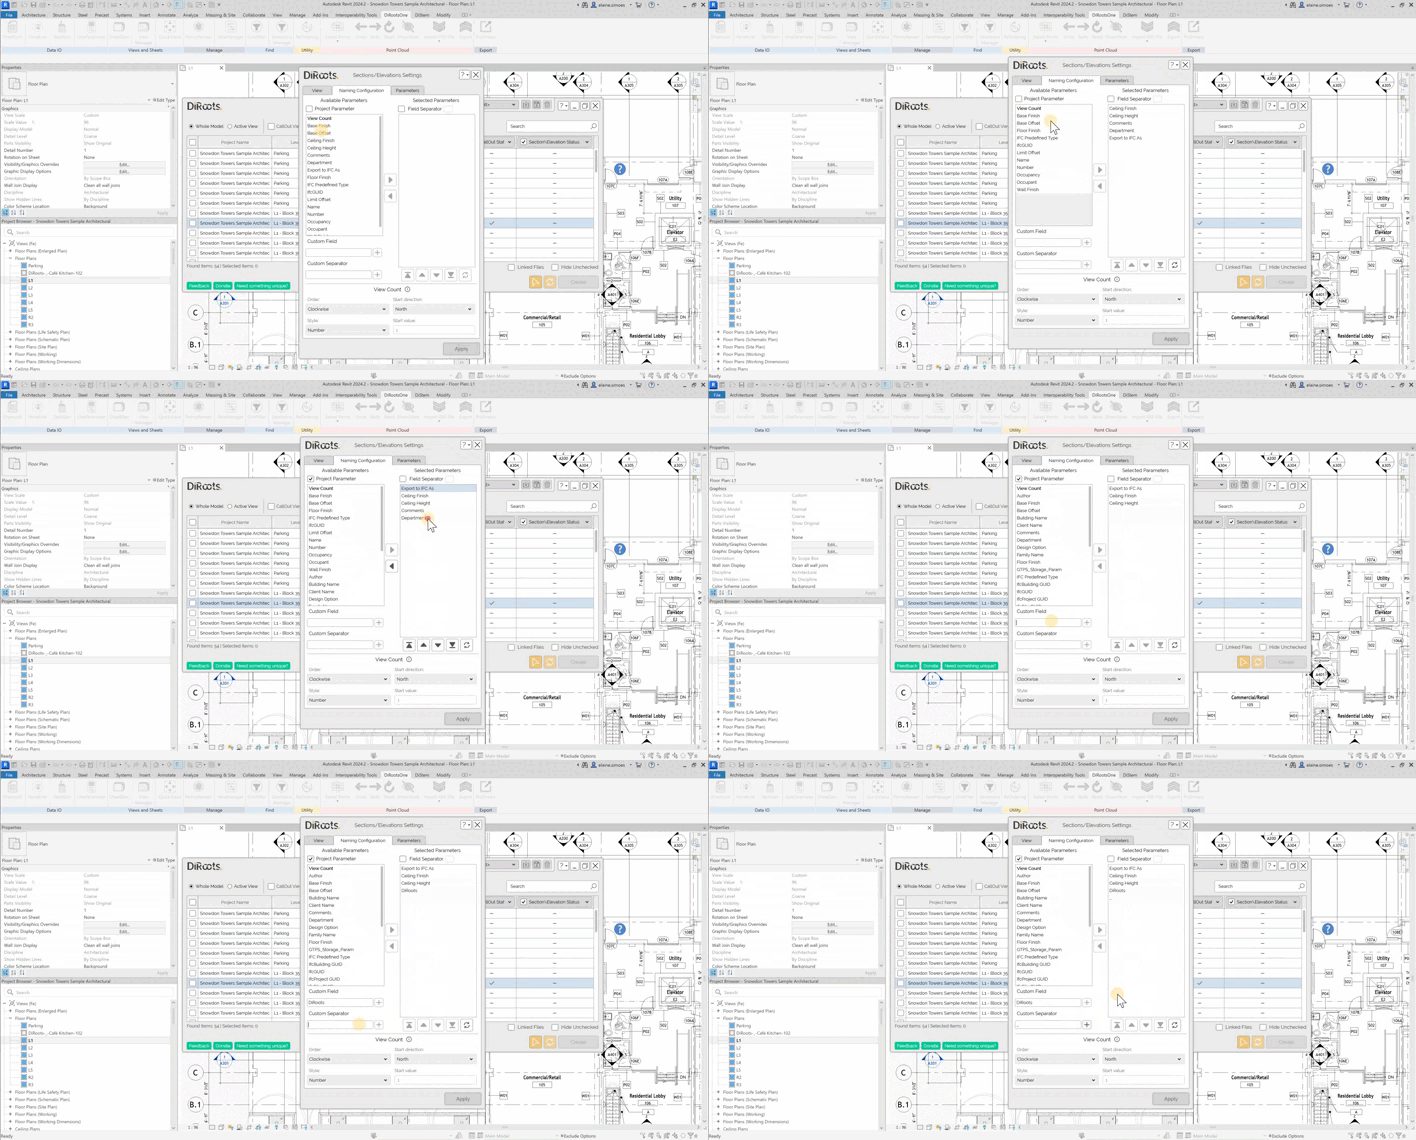
Note: the version on the image may not reflect the latest version of the application.
Let’s create a condition to count the views.
-
Define the follow order by Clockwise or Anticlockwise.
-
Choose the direction to start.
-
Definde the style by number or alphabet.
-
Enter the value to start.
#Caution:
To use the View Count condition, you must to select the View Count Parameter, in the previous table.
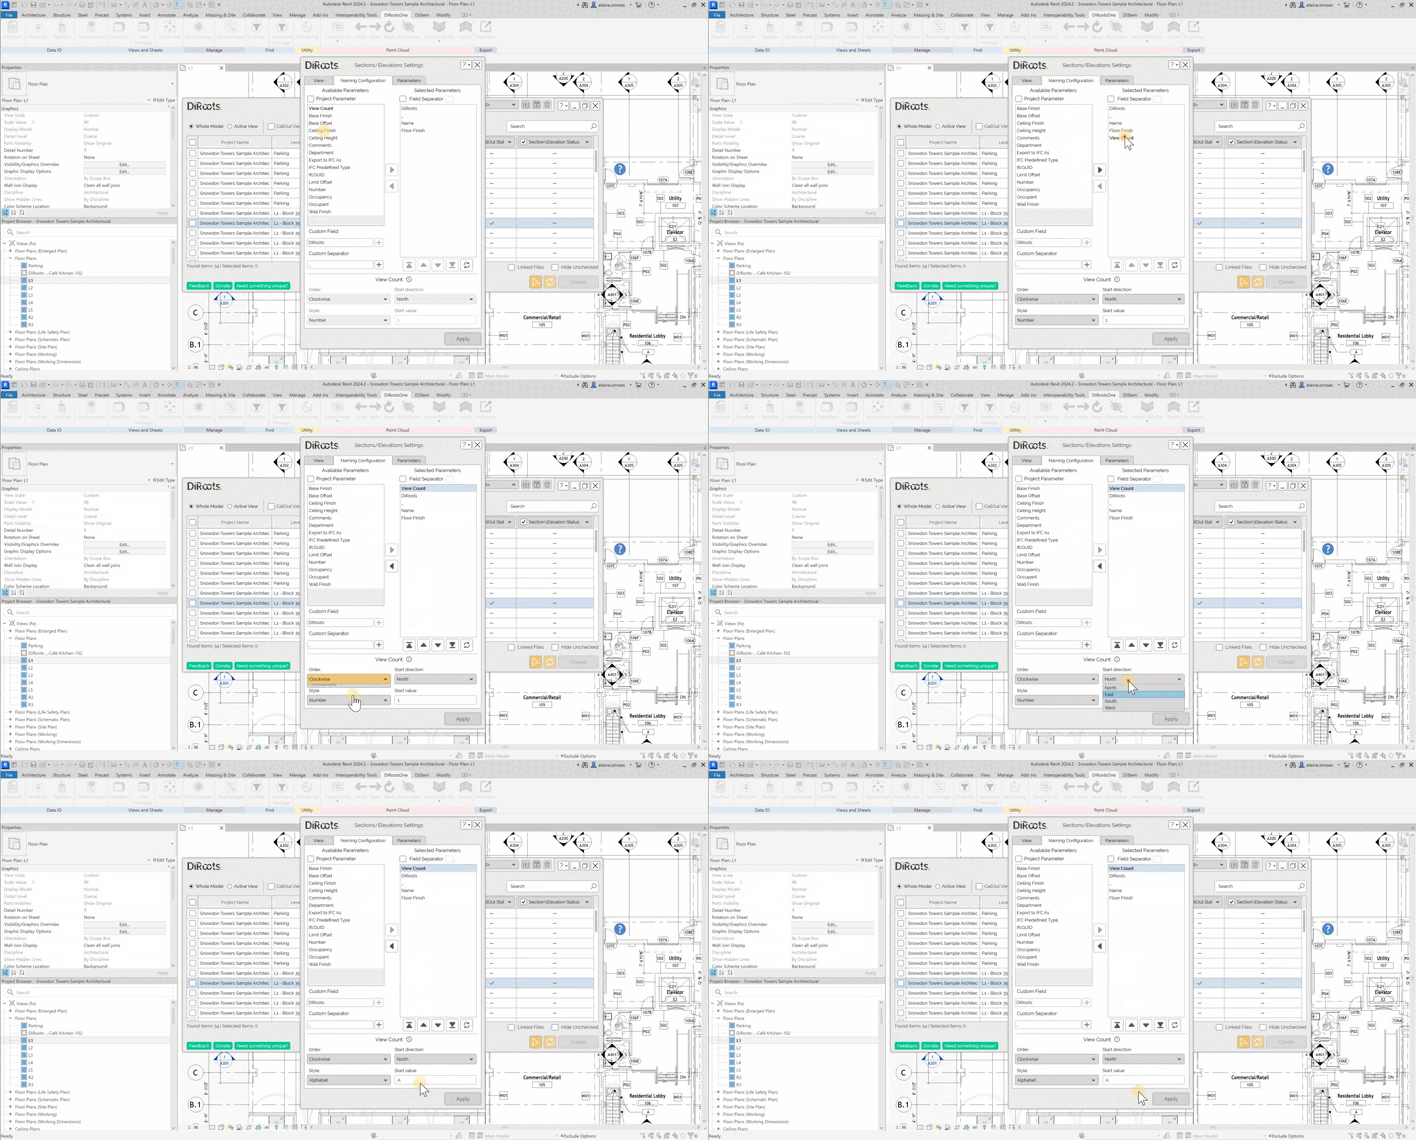
Note: the version on the image may not reflect the latest version of the application.
Parameters tab
To manage this tab you need to create at least one Shared Parameter from the Views category. Then, click on Add button to add a Shared Parameter to the views you are going to create. Once you have added it, open the list to select the parameter and in the second column assign it a text value.
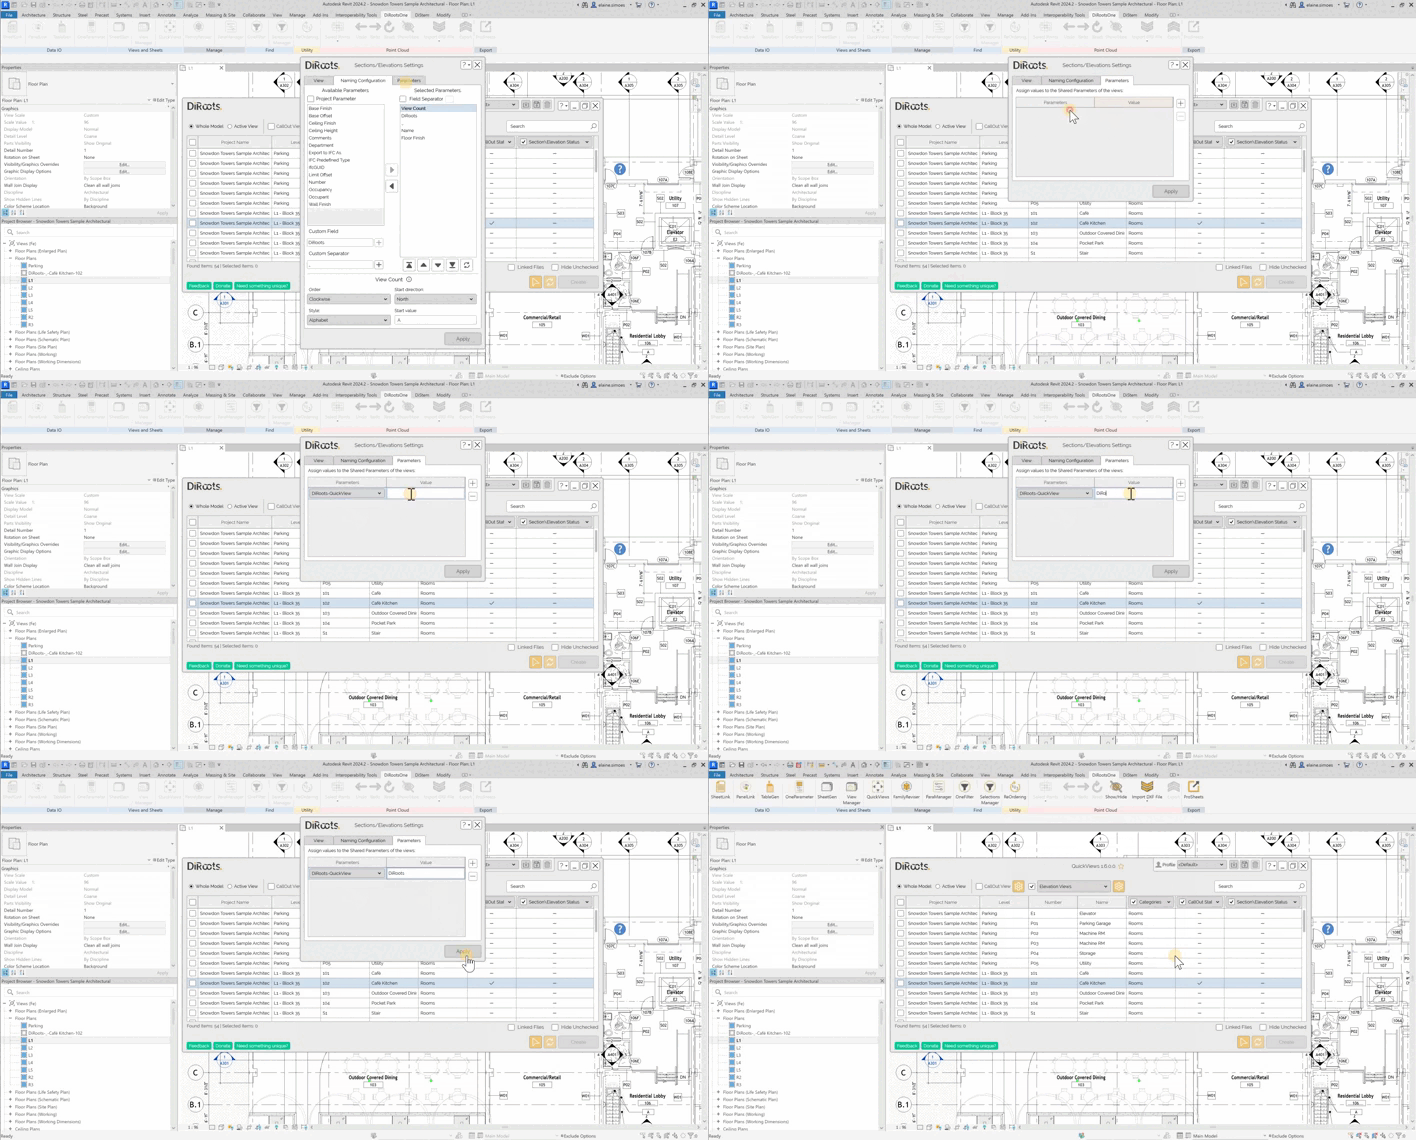
Note: the version on the image may not reflect the latest version of the application.
Save settigs
Click Apply to save the settings and select the rooms and spaces for which you want to create Elevations/Sections views. To finish, click on the Create button and wait a few seconds for the views to be created.
#Note:
You can also use the Select rooms button to choose them manually.
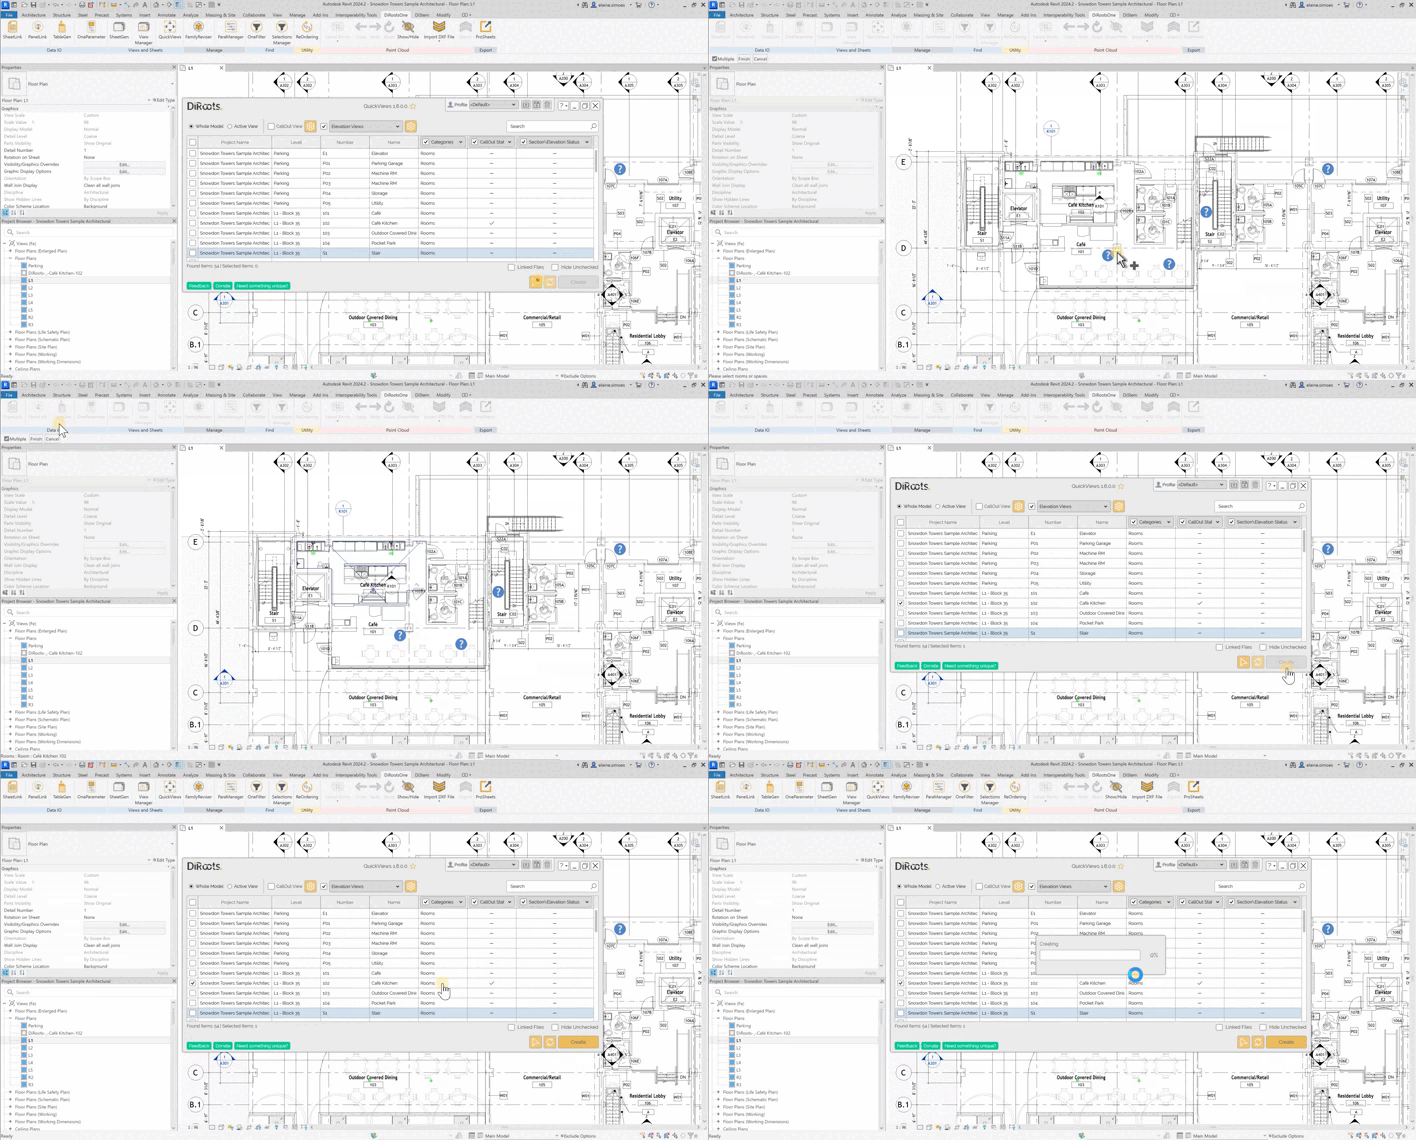
Note: the version on the image may not reflect the latest version of the application.
Right-click actions
Right-click on the room/space within the table and you can:
-
Delete Callout and Elevations/Sections.
-
Open Callout and Elevations/Sections.
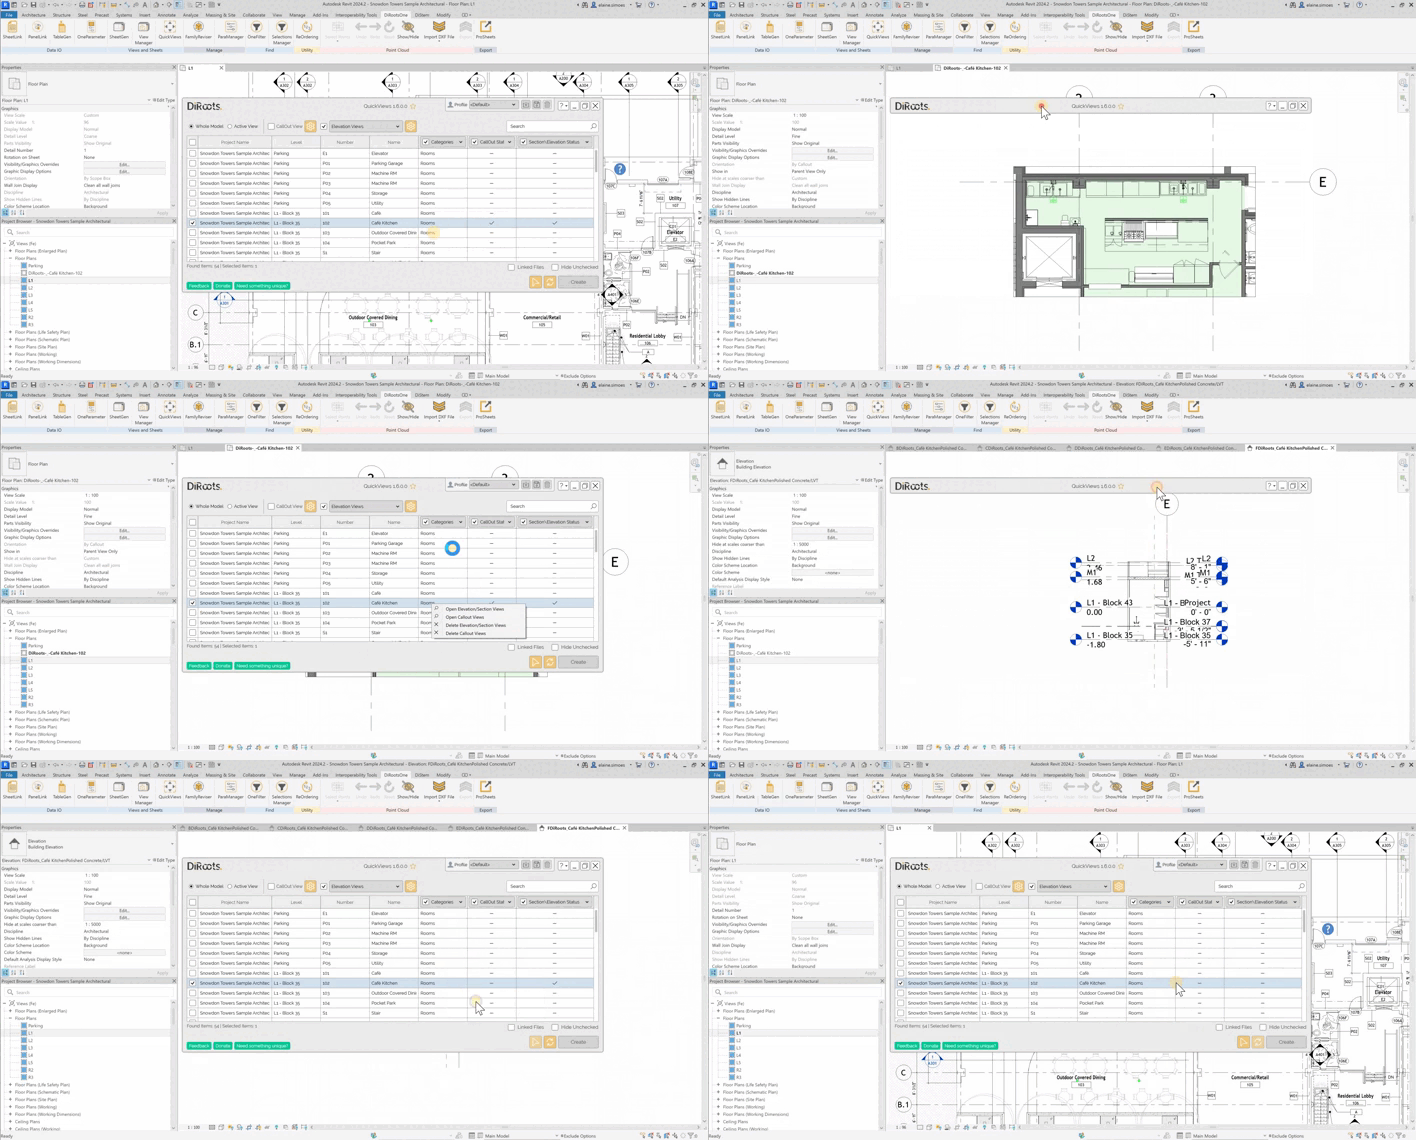
Note: the version on the image may not reflect the latest version of the application.
Update Views
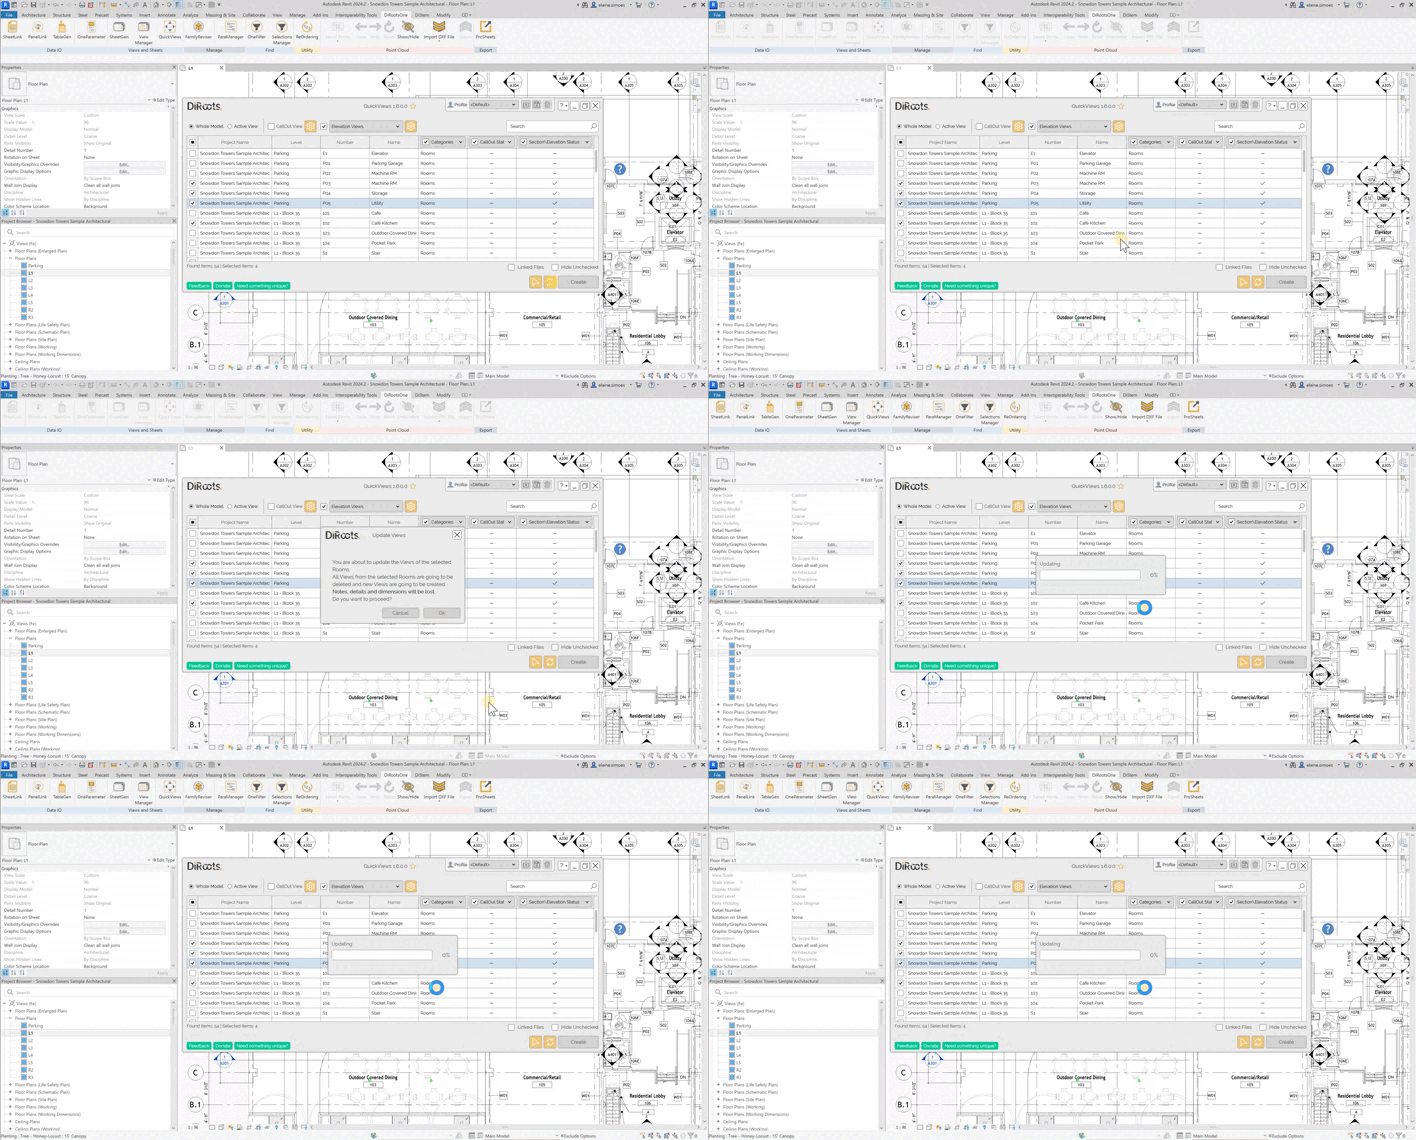
Update the views of the selected rooms/spaces. All the views of the selected rooms will be deleted and new views will be created.
#Note:
Details and dimensions will be lost.
Note: the version on the image may not reflect the latest version of the application.
All done! Verify your created views.
If you want to find out more about QuickViews and explore detailed tutorials on how to use it, visit our YouTube channel. There, you’ll find a series of videos that can help answer questions and improve your knowledge. Be sure to check it out and subscribe to keep up to date with our news and tips!